SAML SSO & SCIM
DeepSource Enterprise Cloud teams can setup SAML 2.0-based Single Sign-On (SSO) for authentication and SCIM for authorization.
Setup SAML SSO
Before you can connect an Identity Provider (IdP) to your DeepSource team, you need to first verify the ownership of your organization's email domain. This should be the domain name of your user's email addresses used for signing into DeepSource.
Request domain verification
-
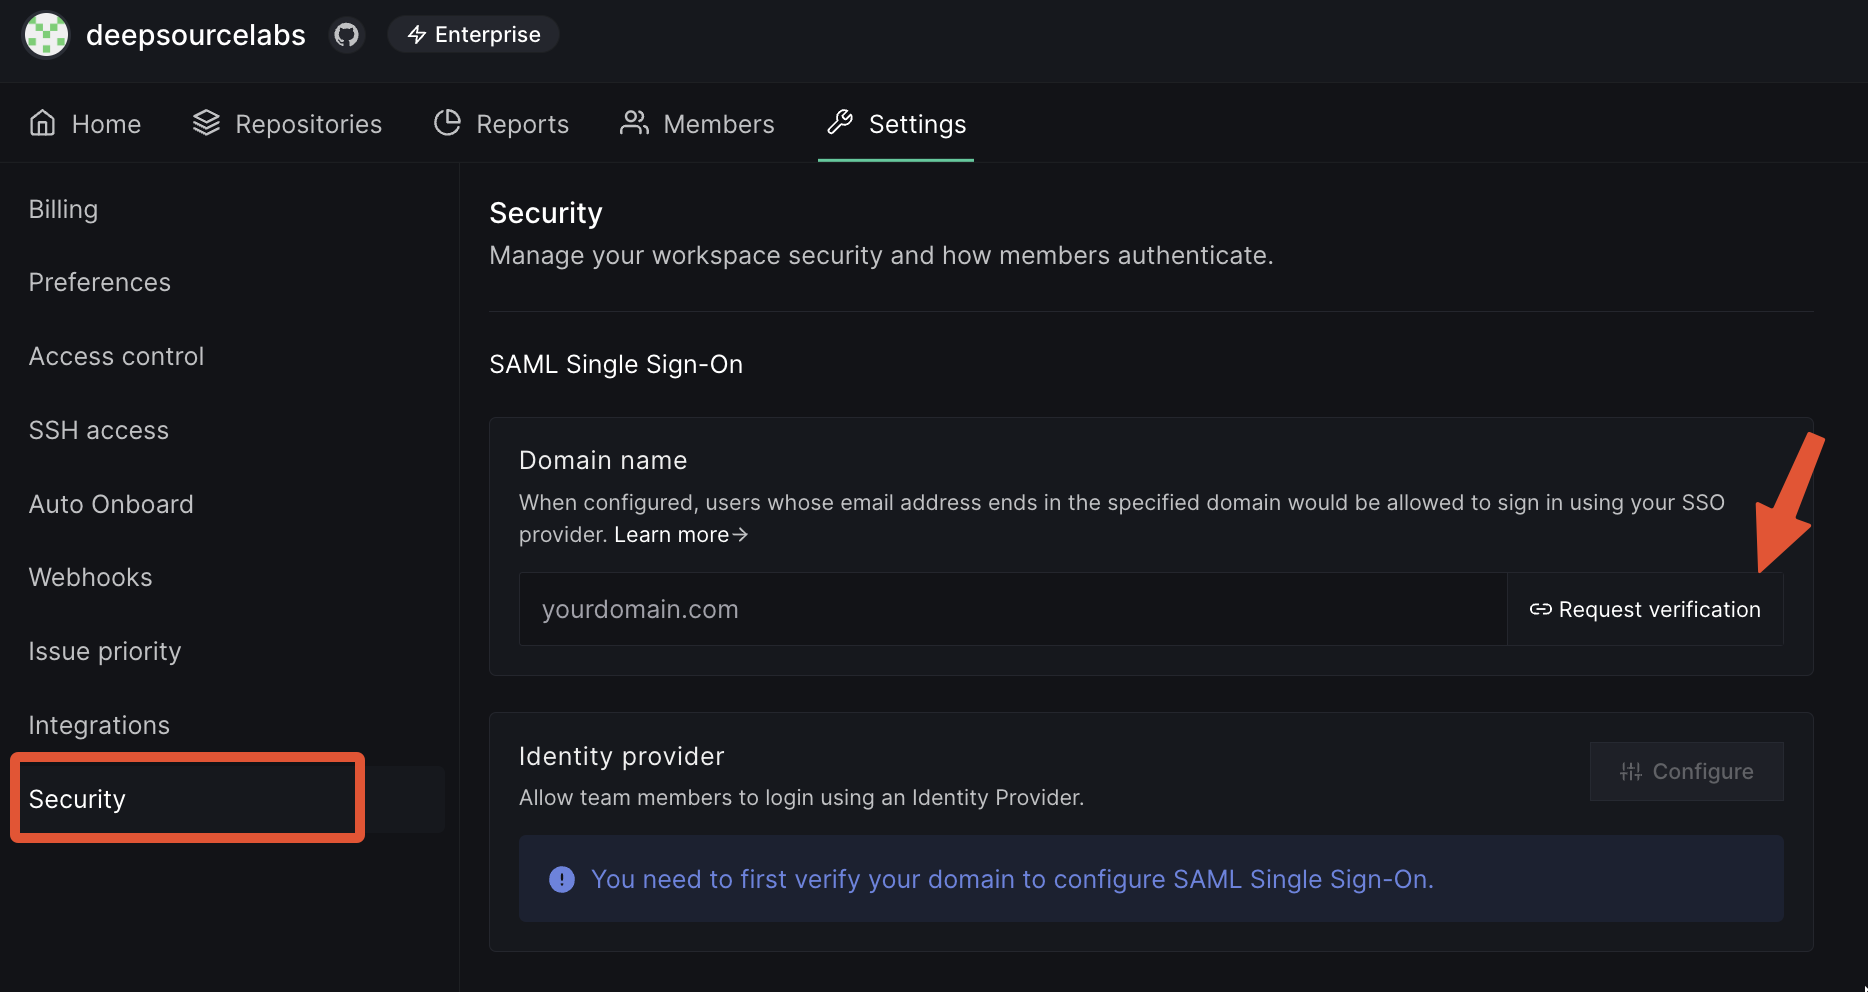
Go to https://deepsource.io.
-
Select the team from the account switcher on the top-left.
-
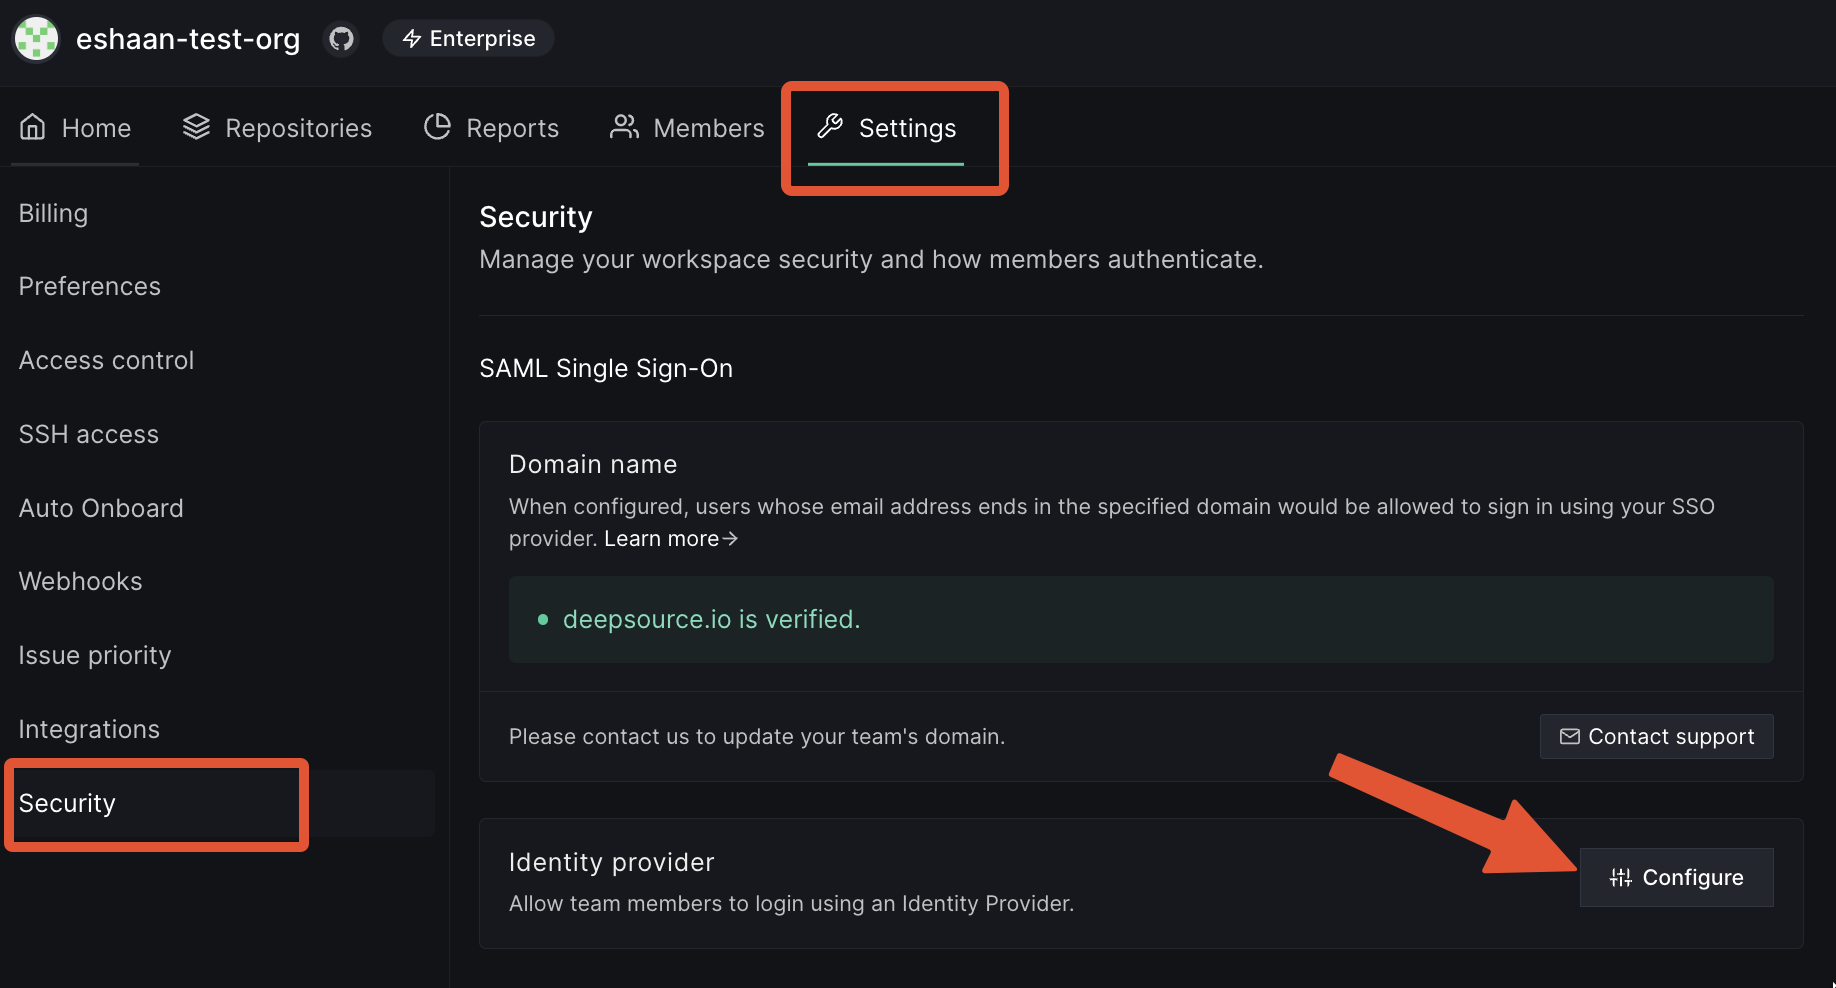
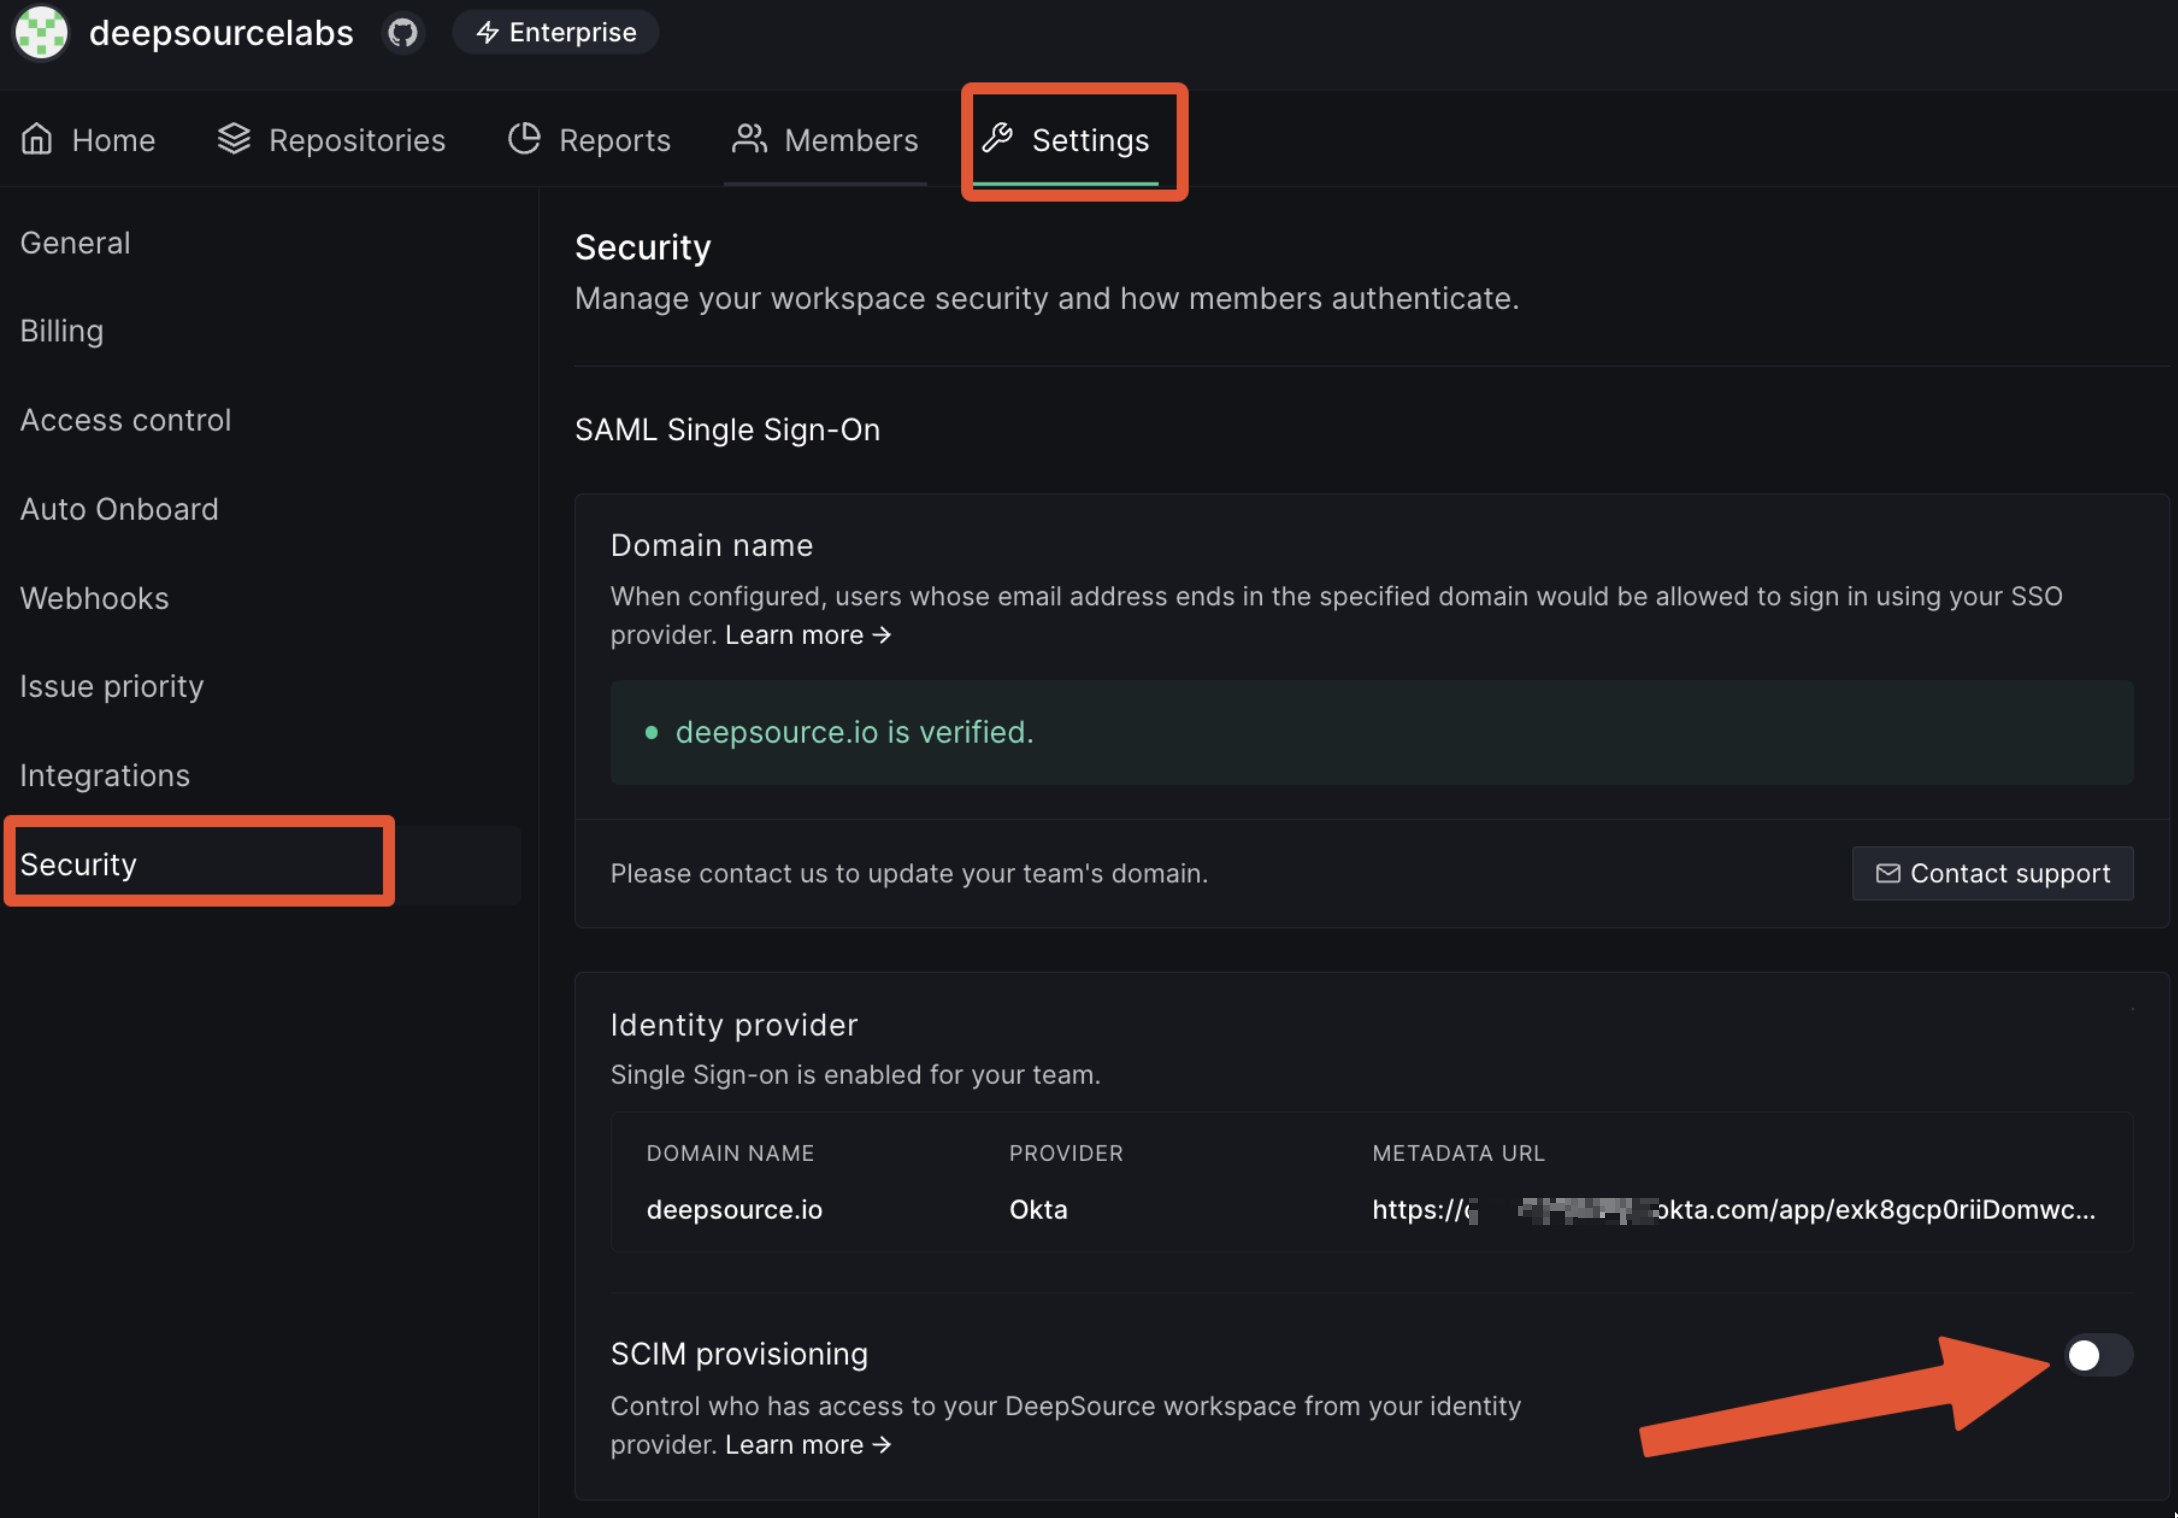
Click on the Settings tab on the nav bar and then click on Security from the left side bar.
-
Under Domain name, enter the domain name you want to verify on DeepSource.
-
Click on Request verification.

-
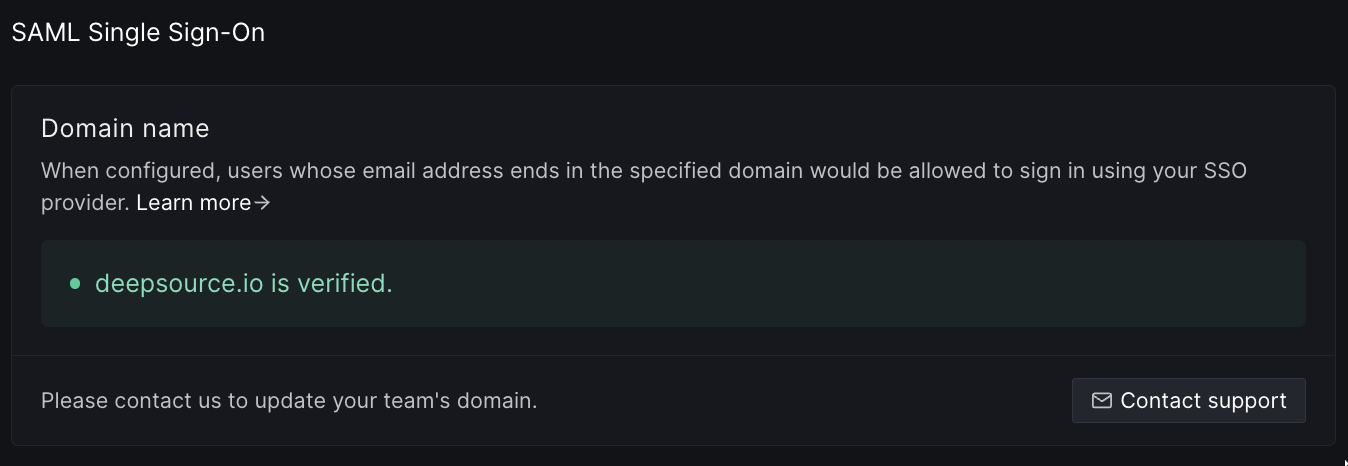
Right now, this process is manual. We will reach out to you by email for a manual verification.
-
Once the verification is done, you can go ahead with configuring an identity provider.
Configuration on Identity Provider
The following is a list of IdPs with links to their respective guides explaining the integration process:
While we only have official guides for the above providers, the overall process remains quite similar while integrating with any other popular IdP (such as Google, PingFederate, etc.) via a SAML 2.0 based connector.
Configuration on DeepSource
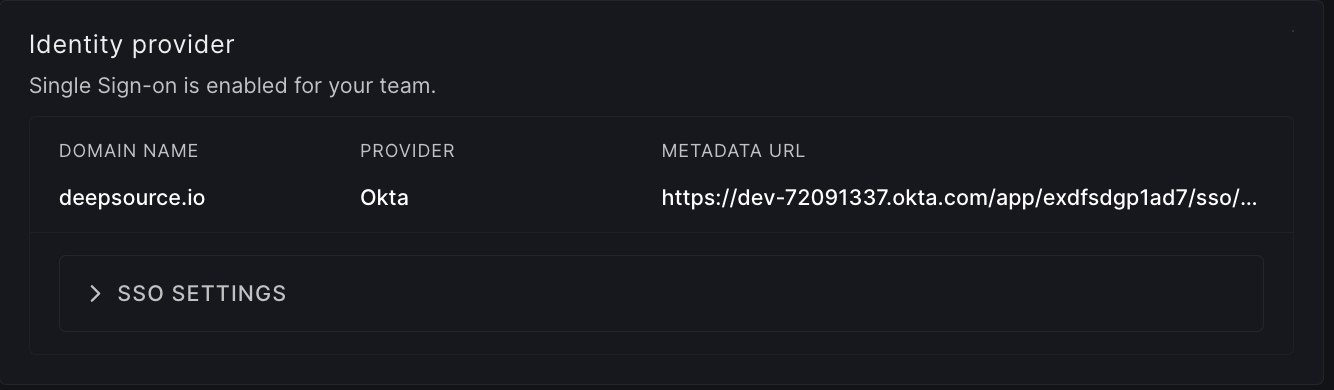
Once DeepSource has verified your domain and you have successfully created and tested a SAML 2.0 connector on the IdP website, you need to tell DeepSource about it.
-
On the same Team settings -> Security page, click on the Configure button.
-
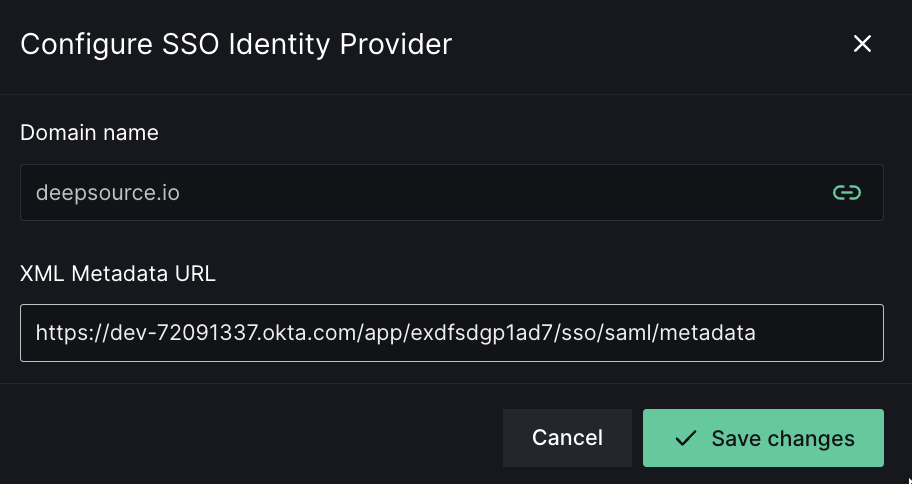
Enter the XML Metadata URL (aka Issuer URL) that you got from the SAML connector in the IdP.
-
Click Save changes.
-
Your IdP is successfully connected with your DeepSource team now. This means users assigned to the app on IdP will be able to sign up or sign in to DeepSource with SAML SSO now.
MEMBER role if there are empty seats else CONTRIBUTOR role.
Setup SCIM Provisioning
SCIM, or System for Cross-domain Identity Management, is an open standard that allows for the automation of user provisioning.
With SCIM enabled for your DeepSource team, users will be provisioned, updated and deprovisioned in real-time with respect to changes on the IdP.
Configuration on DeepSource
Once you have setup SAML SSO, you can optionally enable SCIM provisioning as well.
-
Go to the same Team settings -> Security page.
-
Enable the toggle labeled "SCIM provisioning".
-
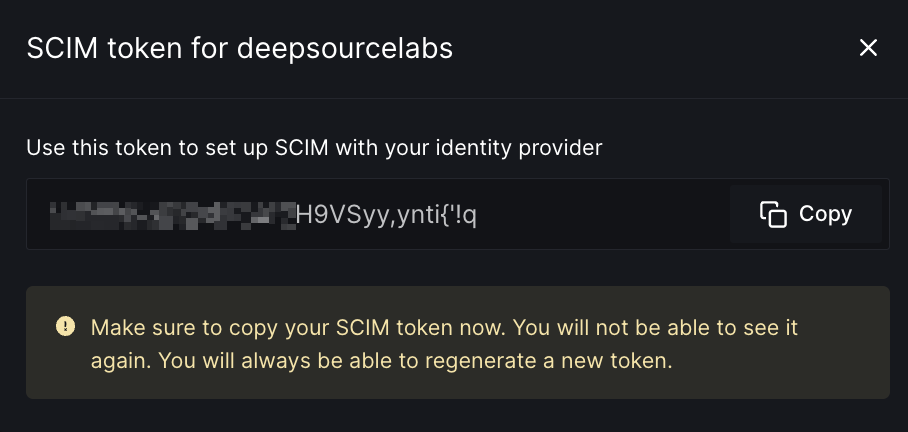
When you toggle it, a modal will pop up displaying the SCIM authentication token. You should copy the token and dismiss the modal.
-
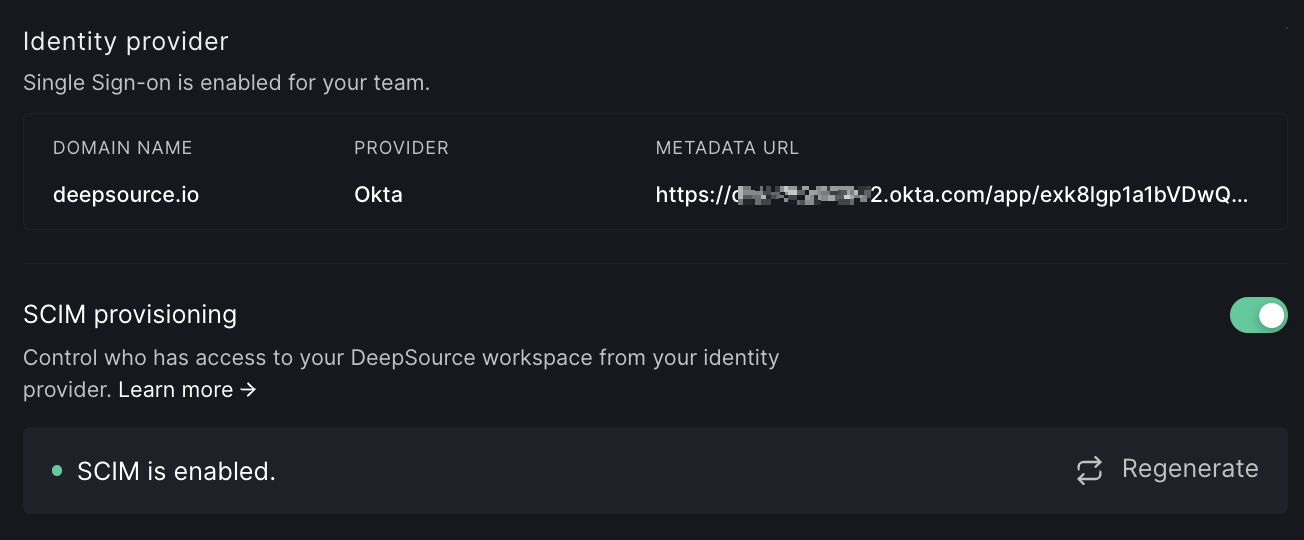
Now SCIM is enabled for your DeepSource team. You may click on the "Regenerate" button at any time to reset the SCIM token.
-
You can go ahead with configuring and testing the SCIM connection on your identity provider. You can find the configuration steps in the "SCIM Provisioning" section for the identity provider chosen in the Configuration on Identity Provider section.