SAML SSO & SCIM: Okta
This document explains the process to enable SAML SSO and SCIM on DeepSource Enterprise Server using Okta as the Identity Provider (IdP).
SAML SSO
Configuring SSO on Okta
For now, an admin (on Okta) needs to create a custom SAML integration for DeepSource Enterprise. The steps for which are as given:
-
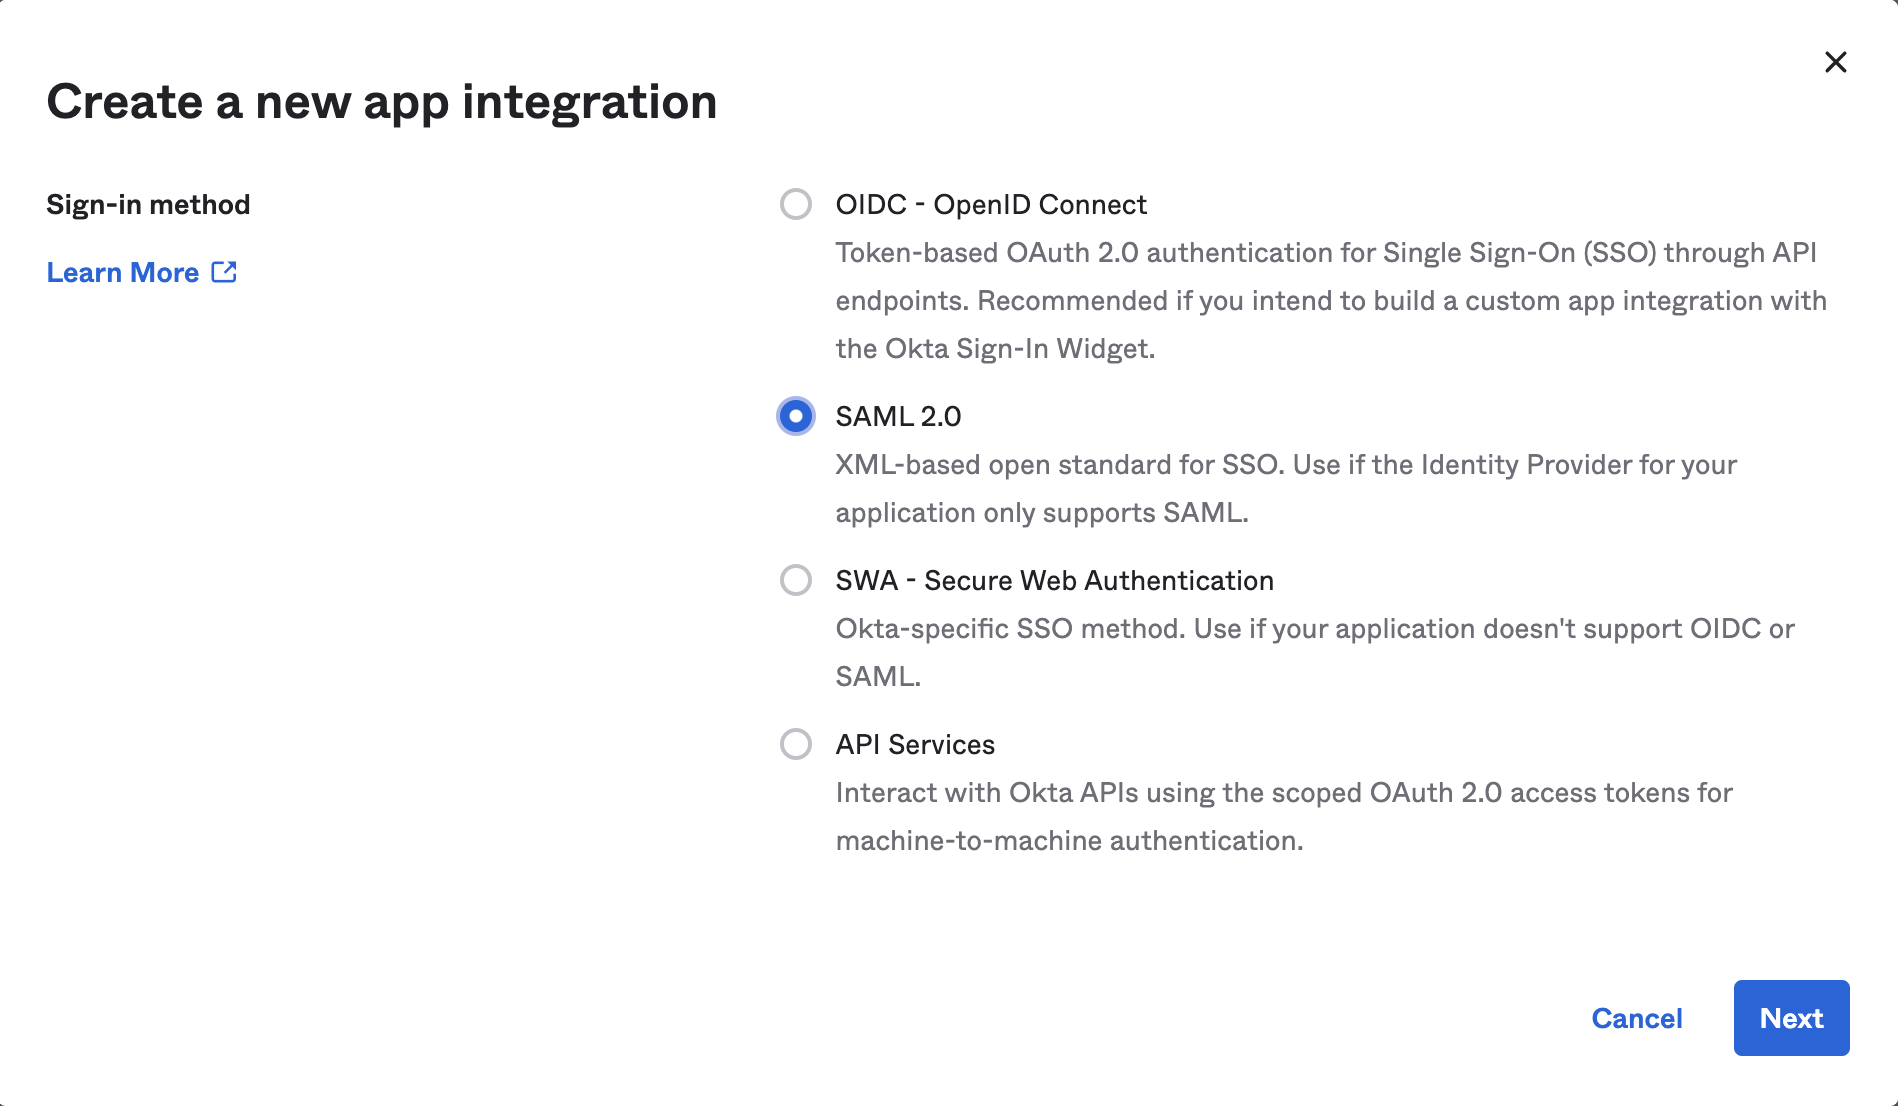
On the left sidebar, choose "Applications" → "Applications", and click on "Create App Integration".
-
Choose "SAML 2.0" and click "Next".
-
Fill in the following details:
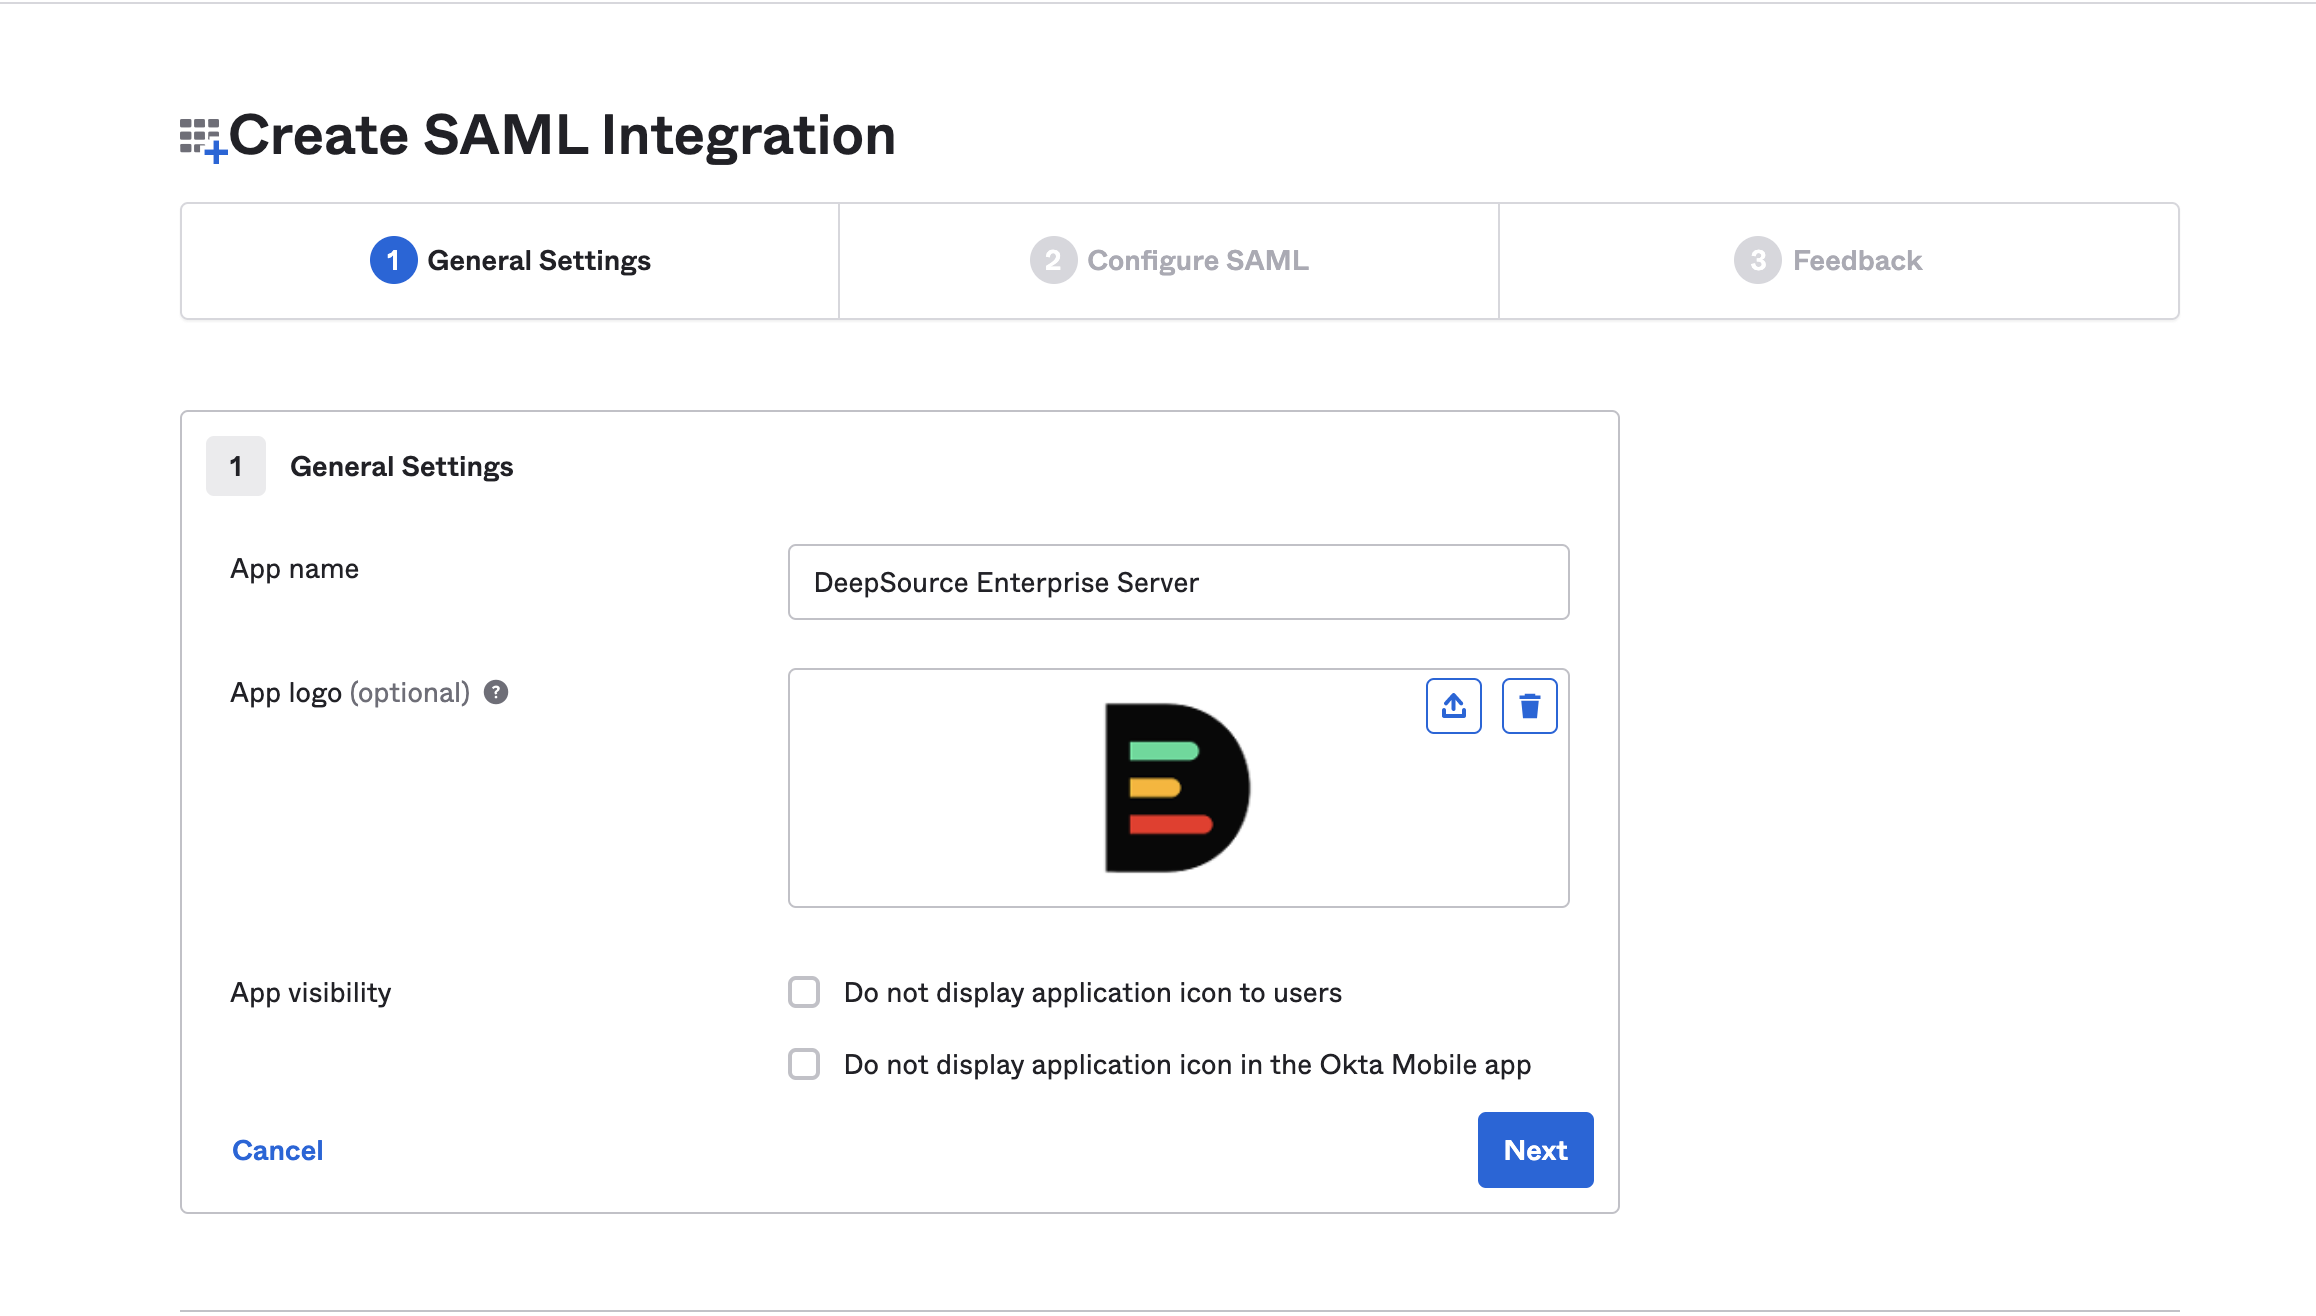
Field Value App Name DeepSource Enterprise Server -
Assuming that DeepSource is hosted on
https://deepsource.foobar.com, fill in the following details accordingly: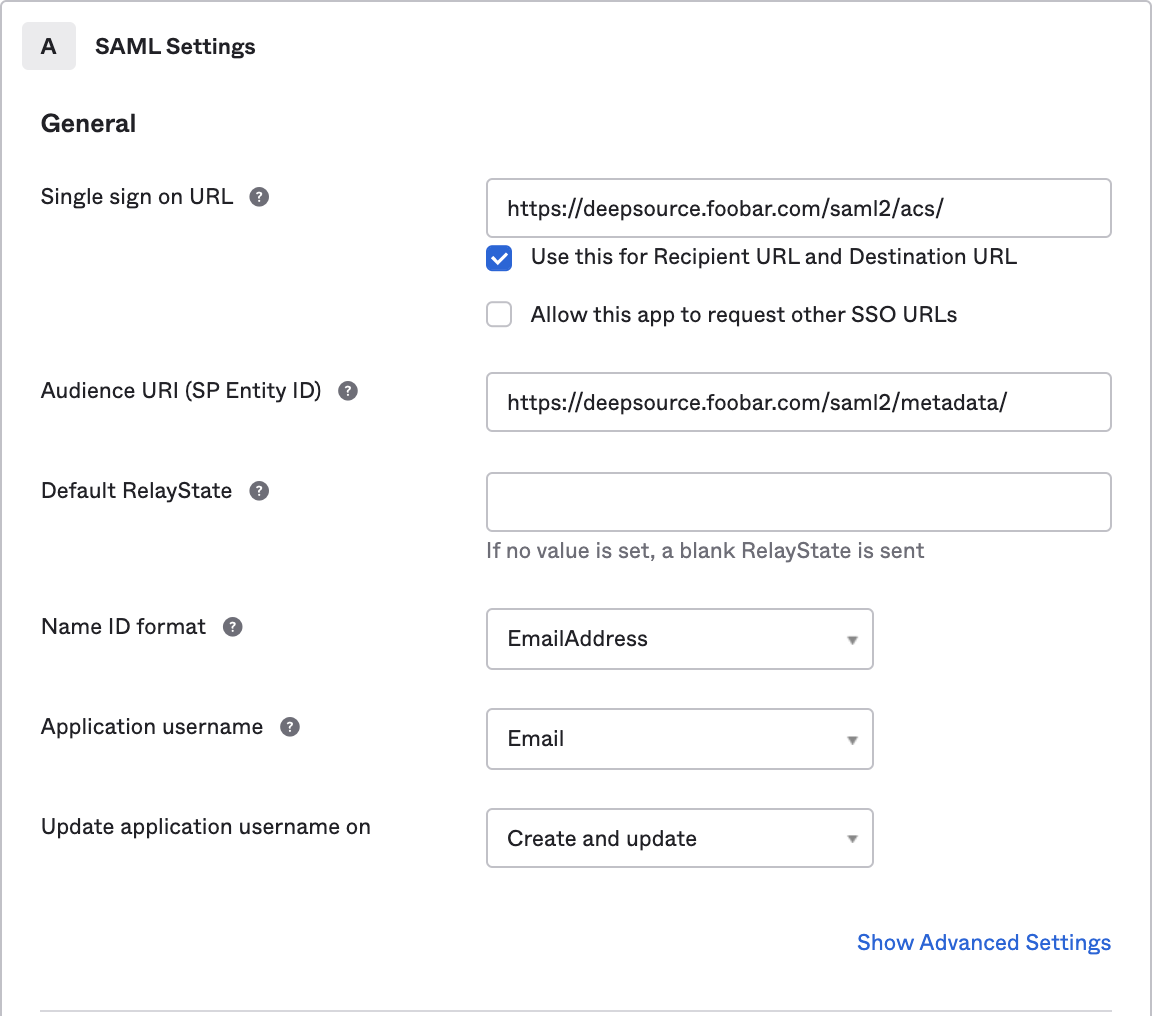
Field Values Single sign on URL https://deepsource.foobar.com/saml2/acs/Audience URI (SP Entity ID) https://deepsource.foobar.com/saml2/metadata/Name ID format EmailAddress (choose from drop down) Application username Email (choose from drop down) -
In "Attribute Statements", add the following:
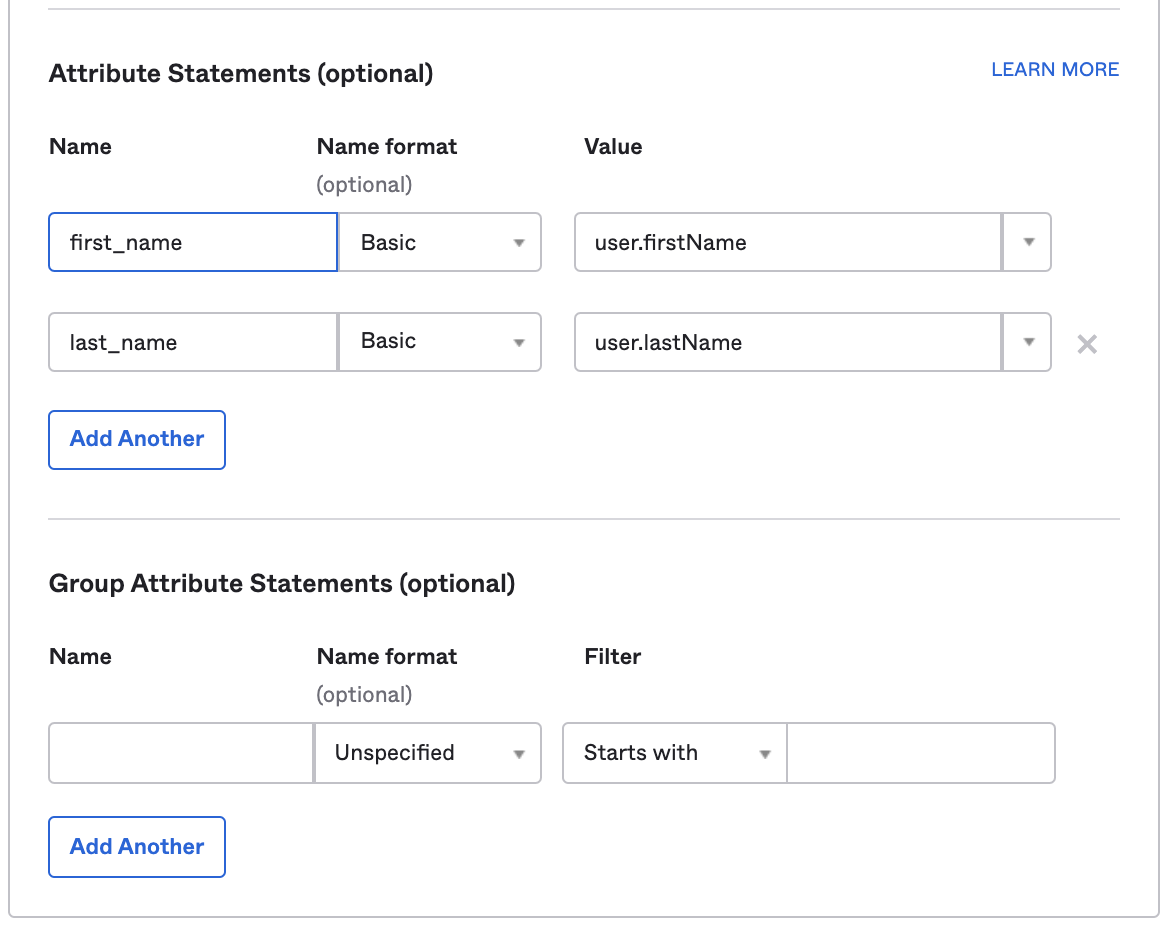
Field Name format Value first_name Basic user.firstName last_name Basic user.lastName -
Under Feedback selection, choose:
- For "Are you a customer or partner?", choose "I am an Okta customer, adding an internal app".
- App type: check the box — This is an internal app that we have created. Otherwise, Okta will ask for many other fields. Click on "Finish".
-
On the next screen, go to the “SAML Signing Certificates” section. Copy the link for "Identity Provider Metadata" by clicking on
Actions -> View IdP metadatafor the “SHA-2 Type” certificate. It should be in the format:https://<customer>.okta.com/app/<app-slug>/sso/saml/metadata.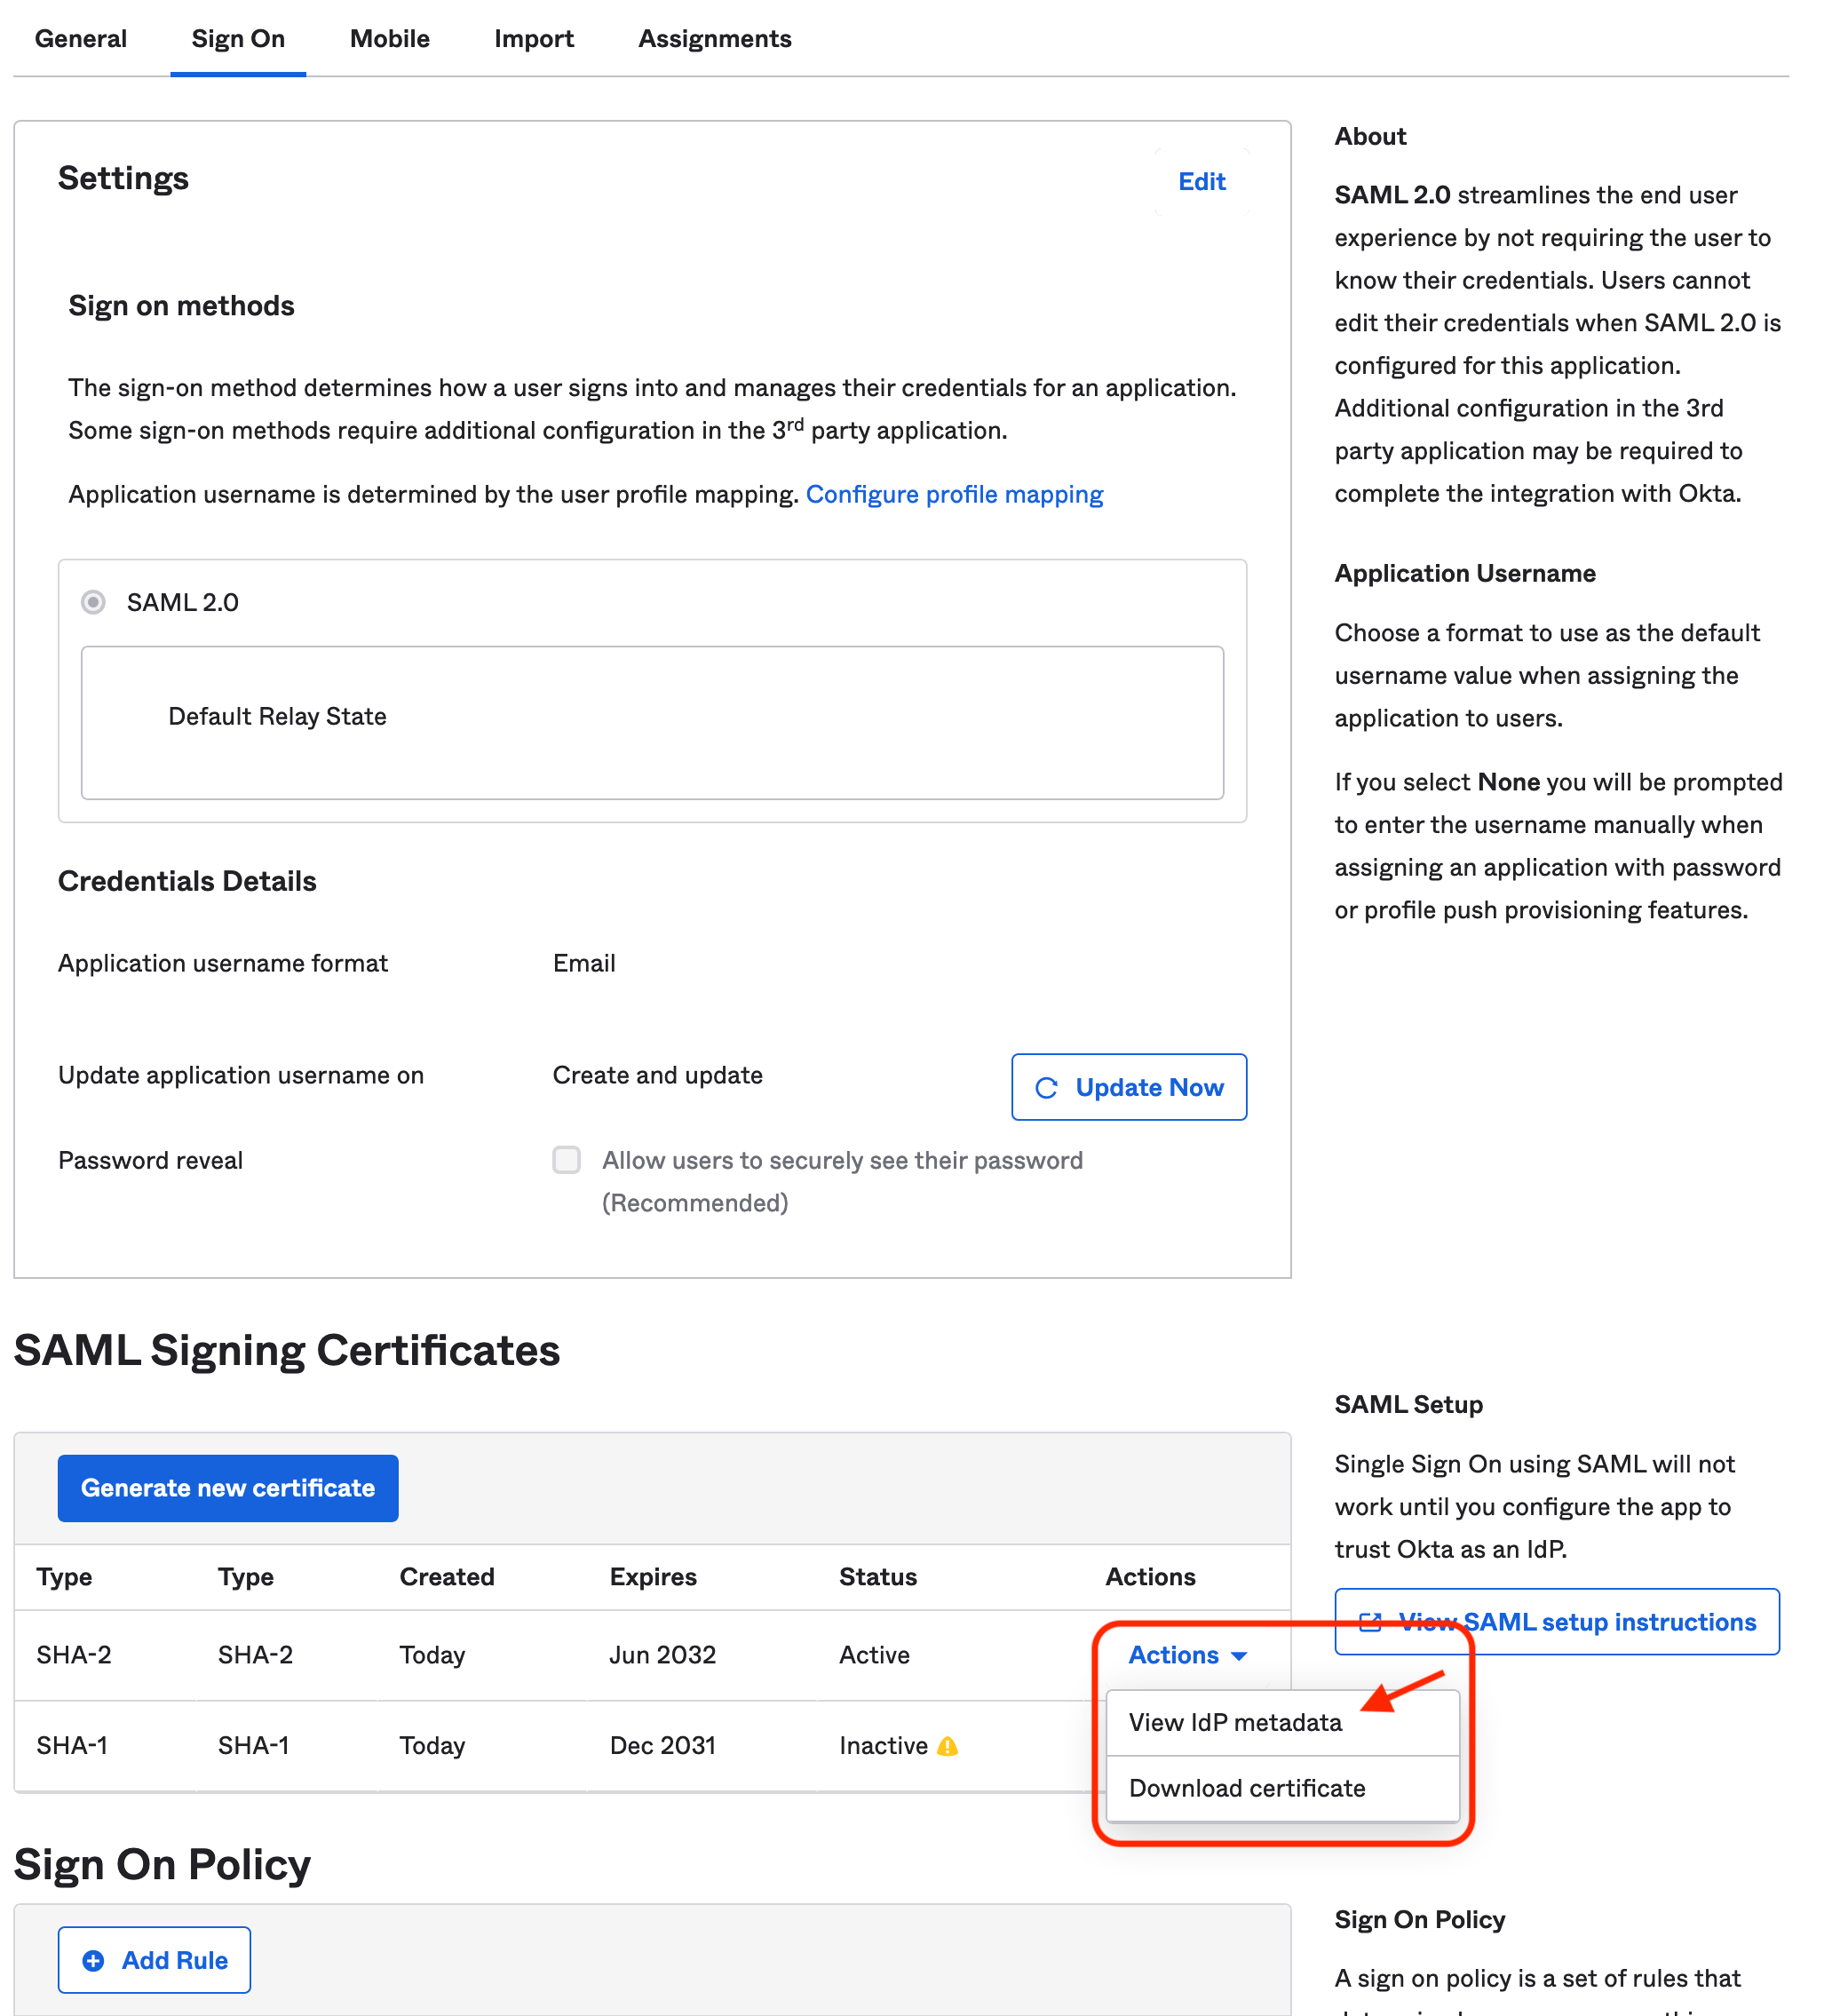
Changes on Kotsadm
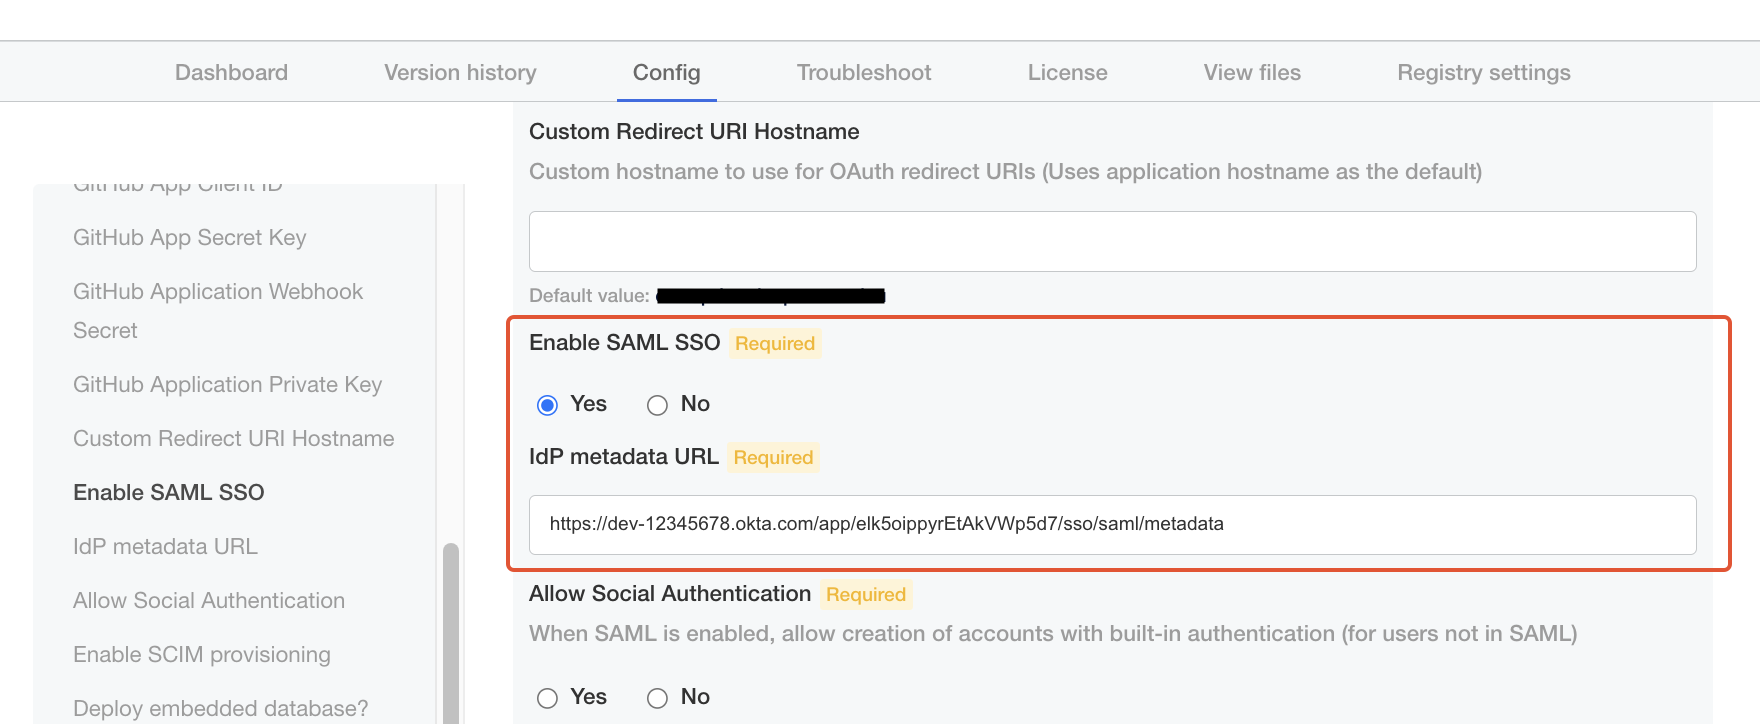
Once SAML has been configured on Azure AD, navigate to “Config” tab in the Admin panel (replicated Kotsadm):
-
Check "Yes" for "Enable SAML SSO".
-
Enter the URL copied in Step 7 above for "IdP metadata URL".
-
One last piece of configuration is whether you want to enable social authentication (i.e. allowing users to be created/log in with GitHub) alongside SAML. In this case, users will be allowed to either sign in via SSO or via OAuth. Choose accordingly.
-
Click save, and deploy the new version.
🎉 You should now be able to Sign in to DeepSource Enterprise with SAML SSO.
SCIM Provisioning
Changes on Kotsadm
Navigate to “Config” tab in the Admin panel (replicated Kotsadm):
- Check "Yes" for "Enable SCIM provisioning".
- Enter a strong secret of your choice in "SCIM Authentication token".
💡 Keep this token saved somewhere, you will need to enter this in Okta while setting up SCIM provisioning
- Click save, and deploy the new version.
Configuring SCIM on Okta
-
To Enable SCIM Provisioning, select DeepSource application, then go to
General → App Settings → Editand turn onEnable SCIM provisioning.
-
Click on the Provisioning tab, under SCIM Connection, click on Edit and configure the given parameters.
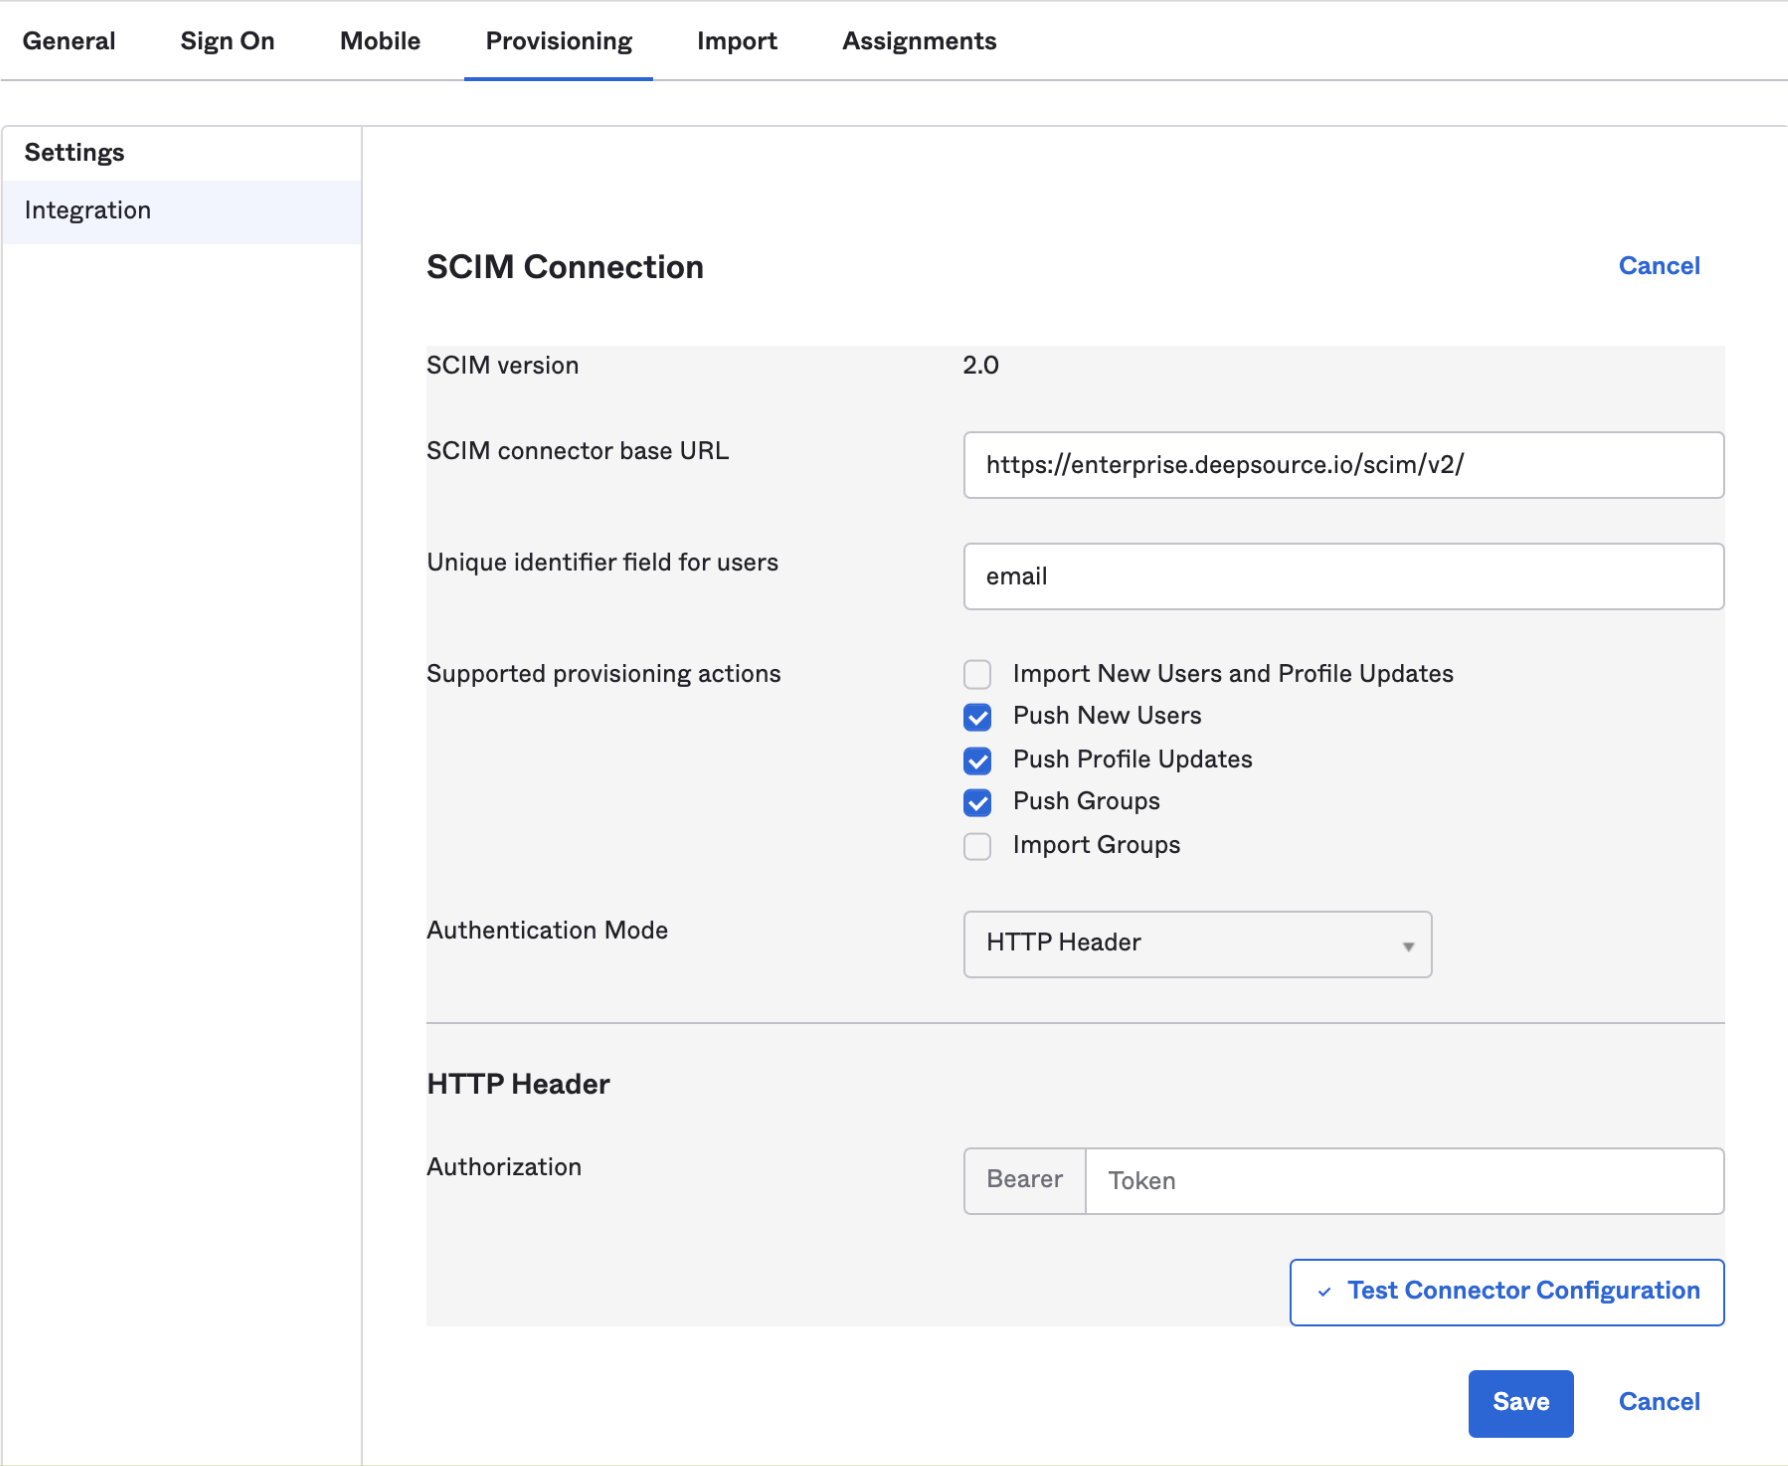
Field Values SCIM connector base URL https://deepsource.foobar.com/scim/v2/Unique identifier field for users email Supported provisioning actions Push New Users, Push Profile Updates, Push Groups Authentication Mode HTTP Header Authorization bearer token SCIM Authentication token which you have put in replicated console (kotsadm) -
Click on Test Connector Configuration to verify SCIM connection.
-
Click on Save to apply the settings.
-
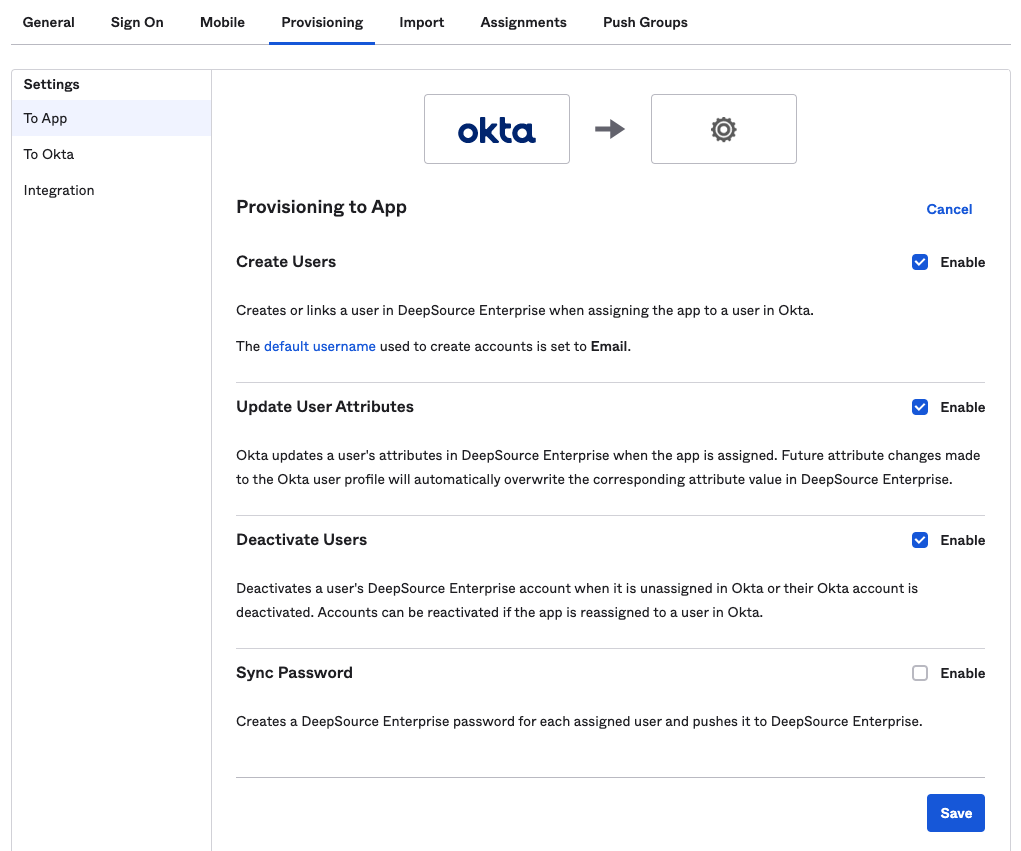
After the integration is saved successfully, go to To App option on the left sidebar under Settings inside Provisioning.
-
Enable the following options:
- Create Users
- Update User Attributes
- Deactivate Users
and, click on Save.
🎉 You have successfully configured SCIM provisioning for your DeepSource Enterprise via Okta.