Installation: Standalone cluster with AMI
DeepSource provides Amazon Machine Images (AMIs) that can be used to deploy DeepSource Enterprise on an EC2 machine using the AMI provided through AWS Marketplace.
Pre-requisites
- Create IAM policy with the following actions:
aws-marketplace:*- For managing AMI Subscription from AWS Marketplace.ec2:*- For managing the DeepSource Enterprise instance.license-manager:*- For managing the AMI License.cloudwatch:*- For managing metrics and logs of DeepSource Enterprise instance.
The JSON for the policy will be something like the following:
    "Version": "2012-10-17",
    "Statement": [
        {
            "Sid": "MarketplaceFullAccess",
            "Effect": "Allow",
            "Action": "aws-marketplace:*",
            "Resource": "*"
        },
        {
            "Sid": "EC2FullAccess",
            "Effect": "Allow",
            "Action": "ec2:*",
            "Resource": "*"
        },
        {
            "Sid": "LicenseManagerFullAccess",
            "Effect": "Allow",
            "Action": "license-manager:*",
            "Resource": "*"
        },
        {
            "Sid": "CloudWatchFullAccess",
            "Effect": "Allow",
            "Action": "cloudwatch:*",
            "Resource": "*"
        }
    ]
}
The policy documented above is permissive. This policy allows for an easy installation of DeepSource Enterprise. After setting up DeepSource Enterprise you can reduce the scope of the policy according to your requirements. - Attach policy to existing IAM User or Create a new IAM user with the policy added to it.
- Login as the user to which policy is attached.
- Make sure you have valid license file from DeepSource, for more info contact enterprise-support@deepsource.io.
For more info on AWS IAM policies and users, visit https://docs.aws.amazon.com/IAM/latest/UserGuide/access.html.
Installation
-
Visit Marketplace listing for DeepSource Enterprise here and subscribe to product by clicking Continue to Subscribe (don't worry you won't be charged for subscription).

-
Read the Terms and Conditions and if you agree with them, proceed further by clicking on Accept Terms.

-
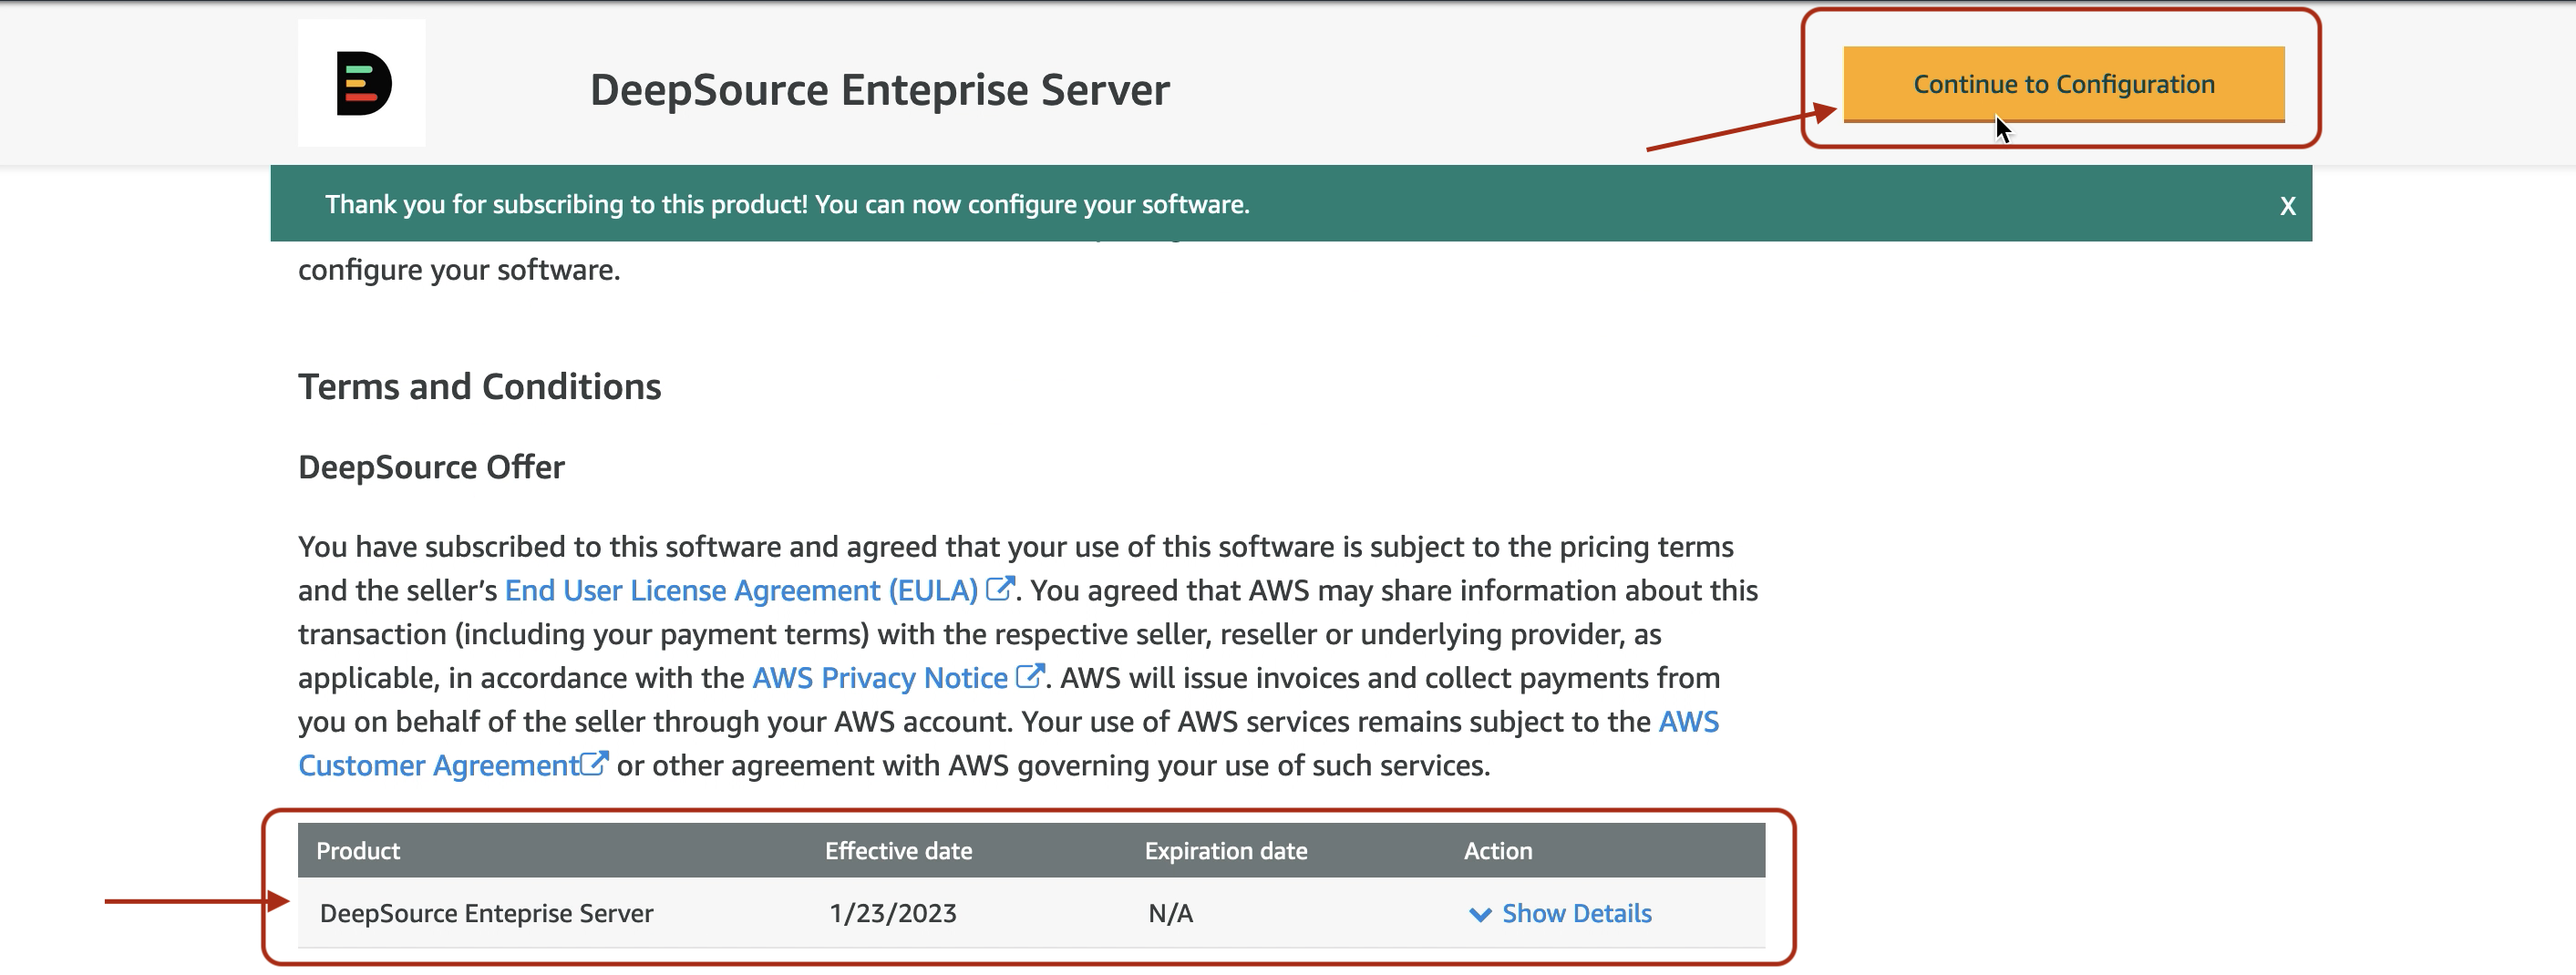
Wait for Subscription process to finish and then click on Continue to Configuration.
-
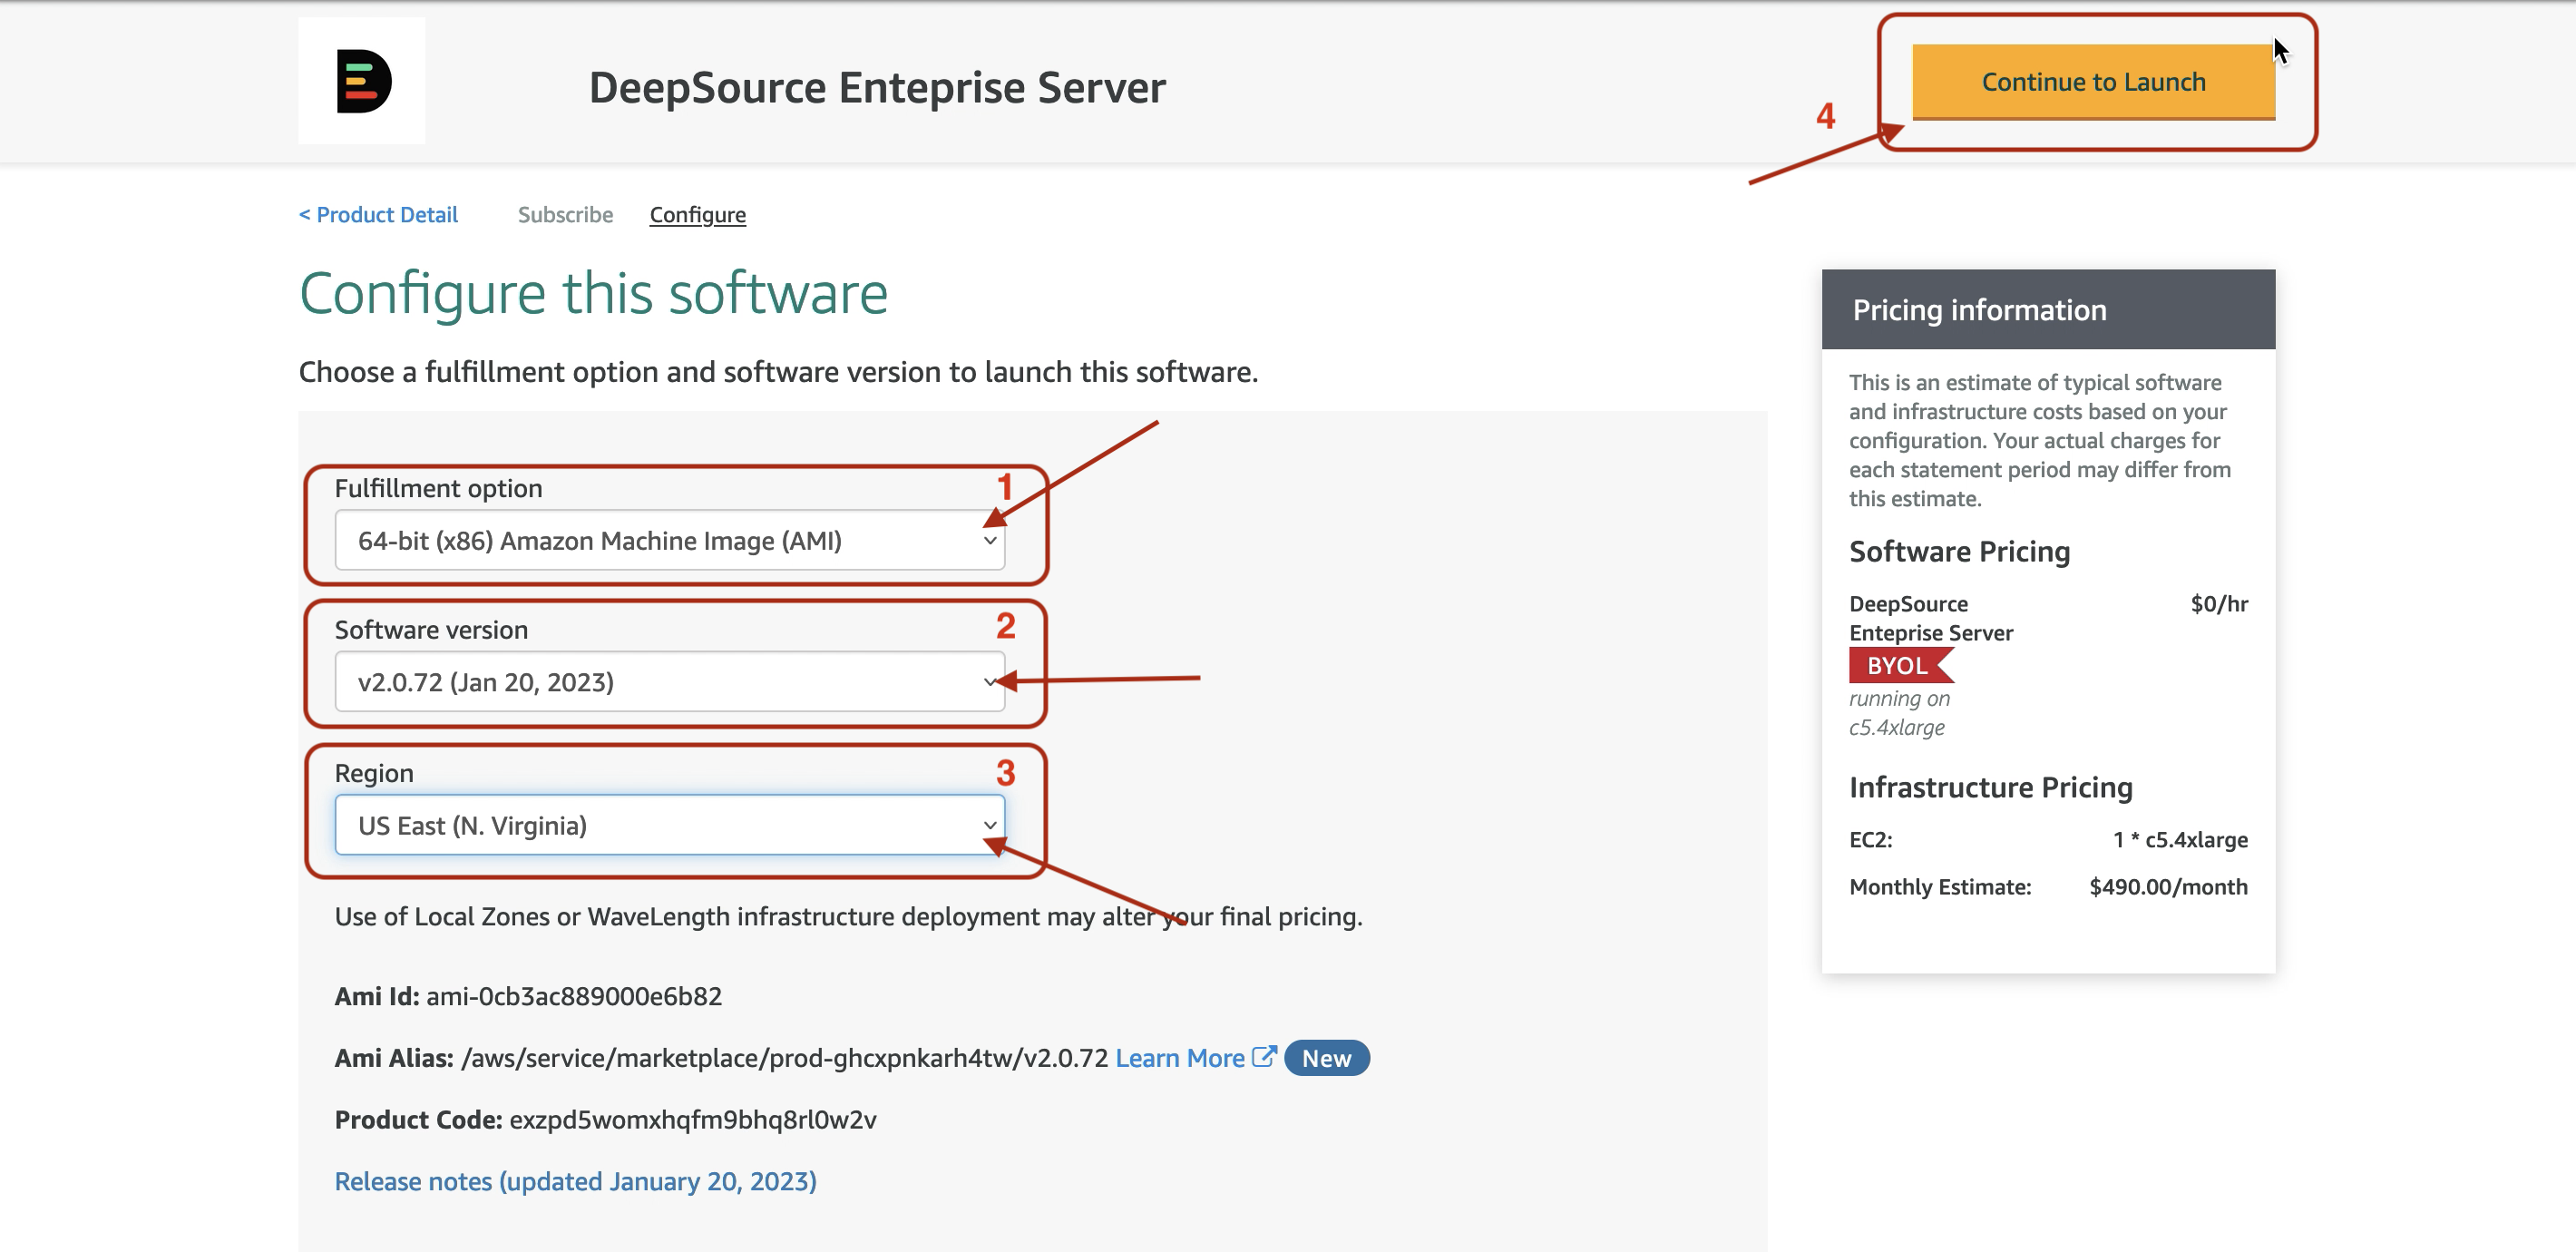
Set the software version to v2.0.72 and select the appropriate region from the drop down menu and proceed by selecting Continue to Launch.
-
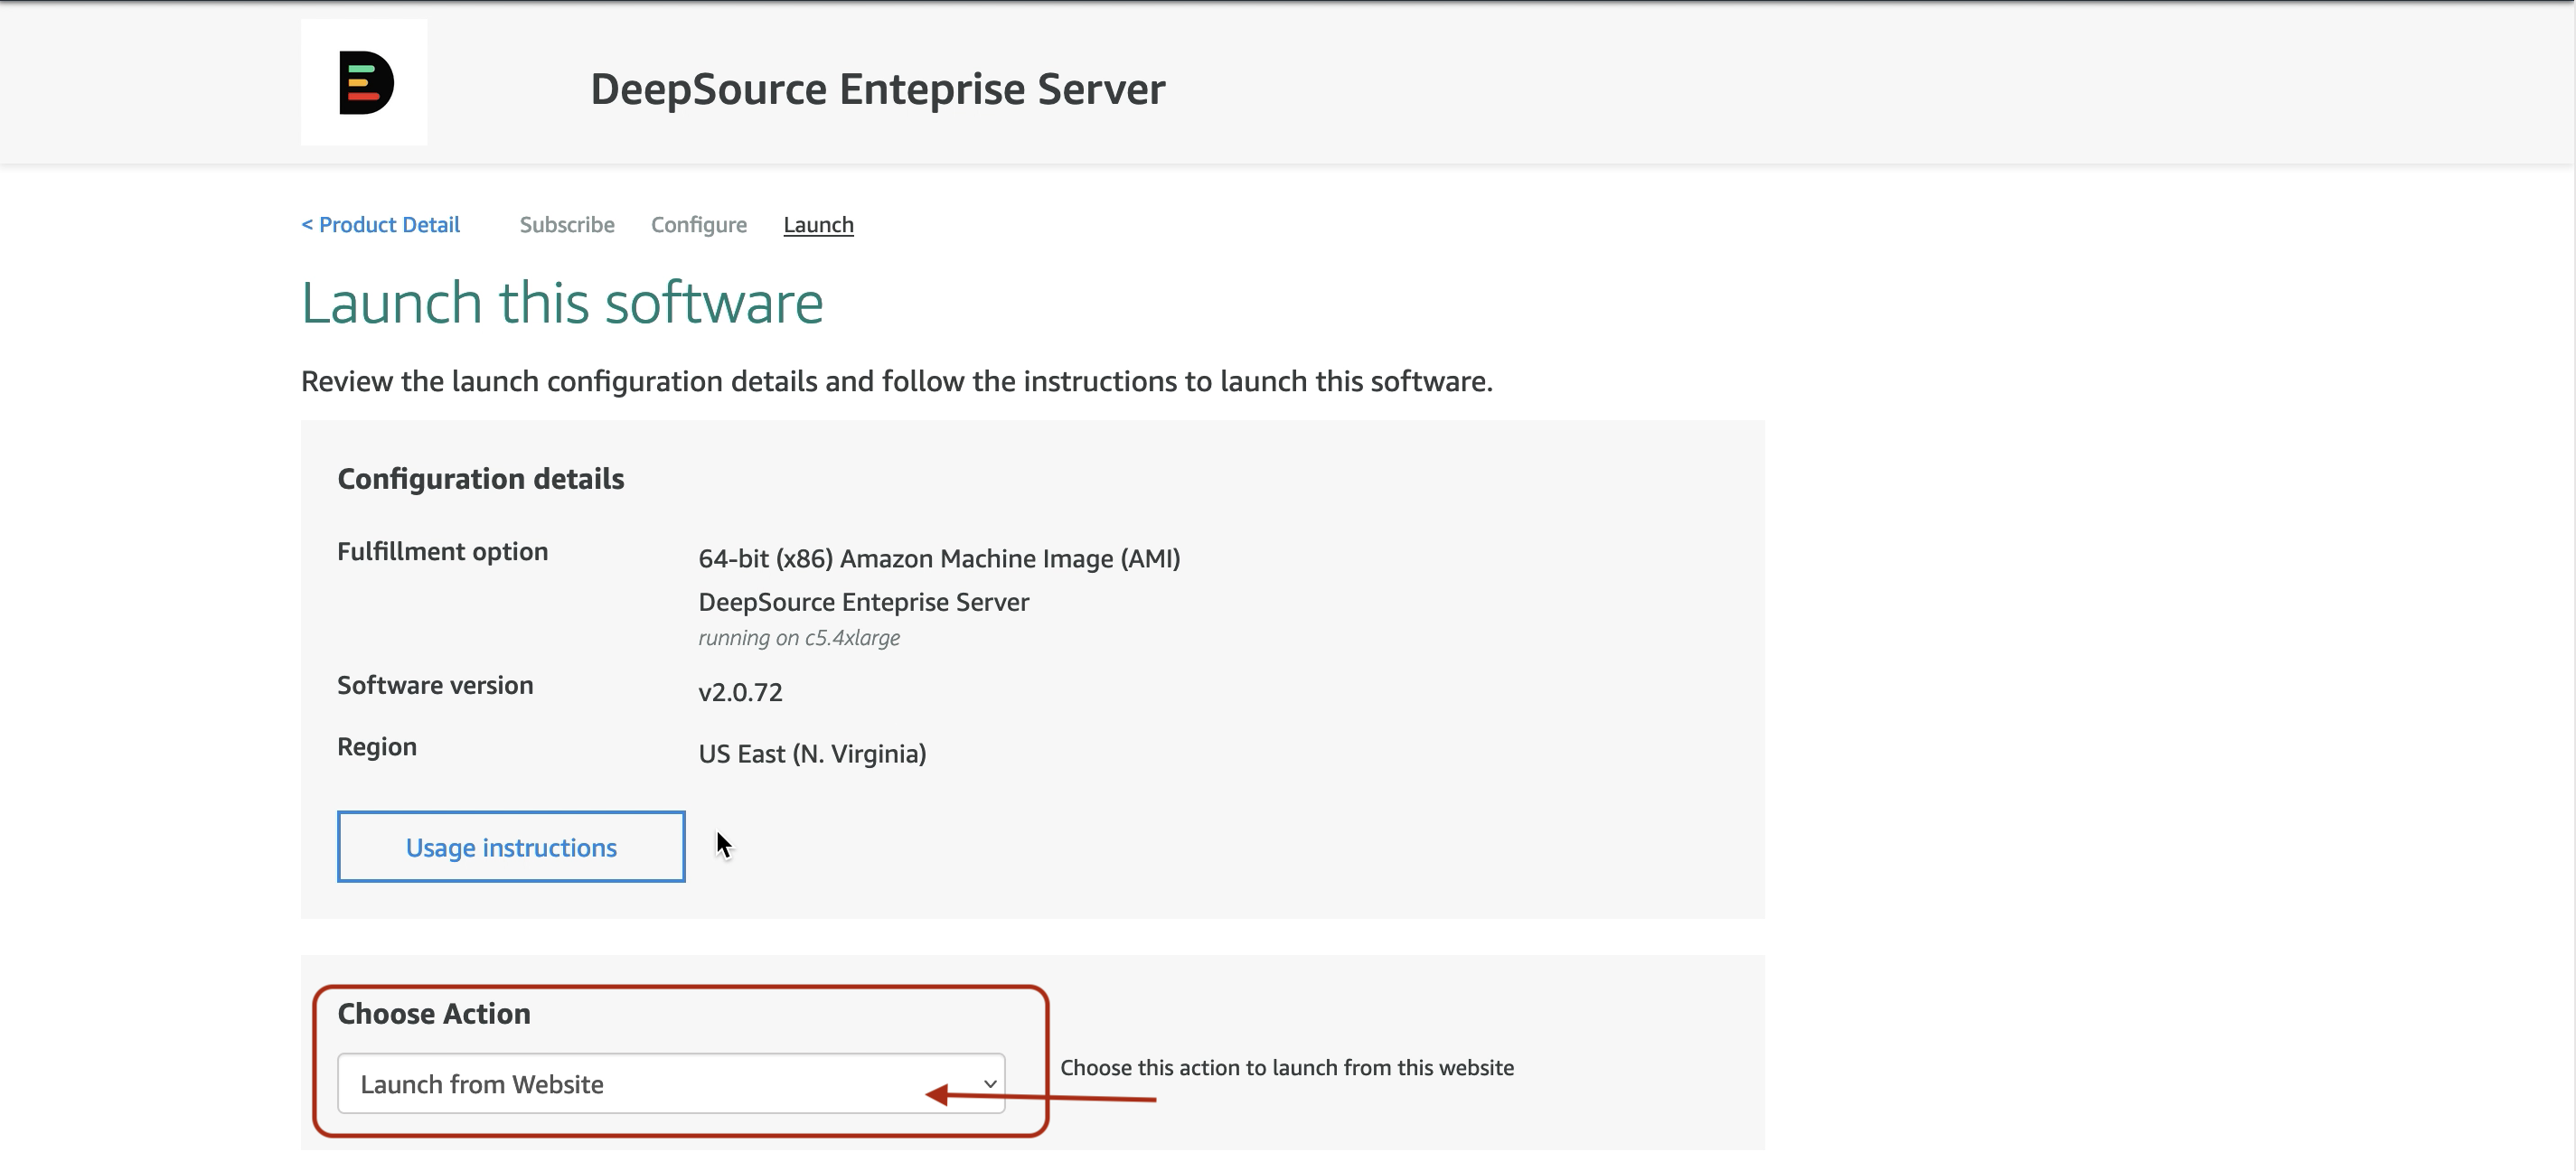
Make sure Launch from Website is selected in Choose Action.
-
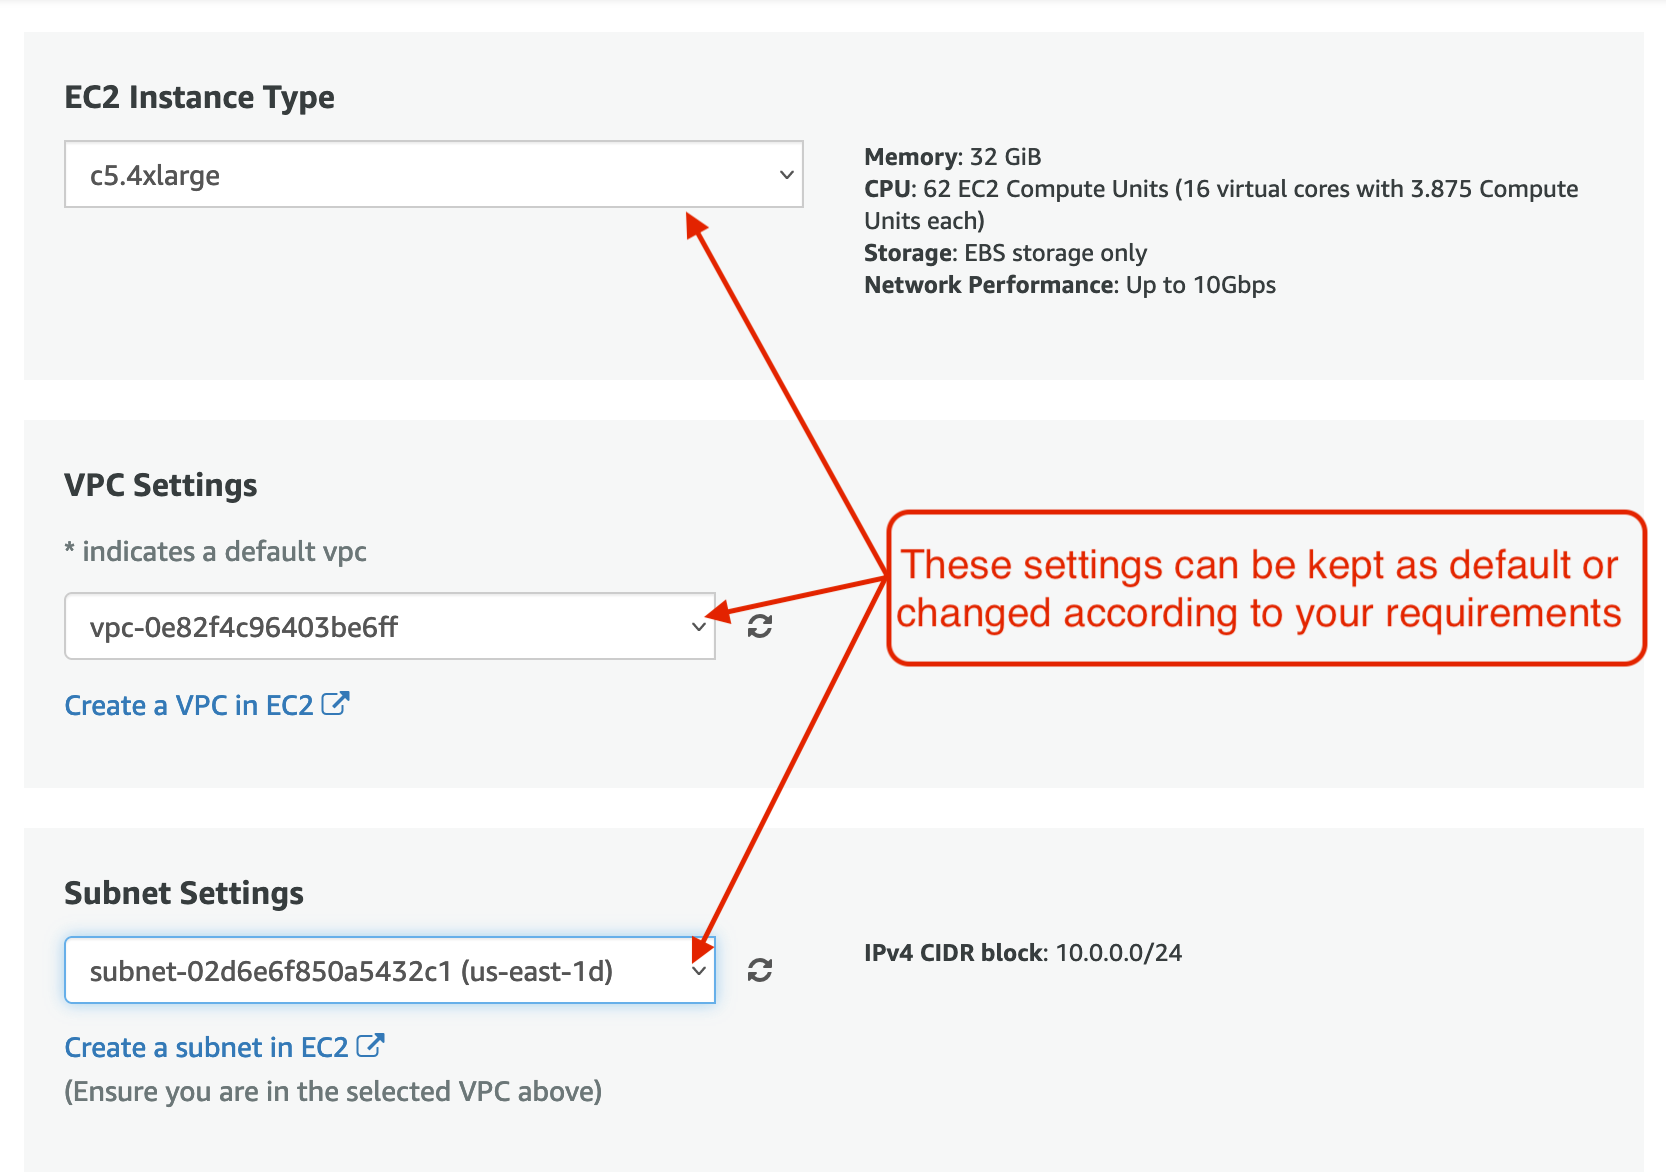
By default AWS will fill the following selection menus with appropriate config which can be changed as per your requirements.
-
Do note in the Security Group section select Create New Based On Seller Sections

and then Save the Security Group while making sure it is the one that is selected.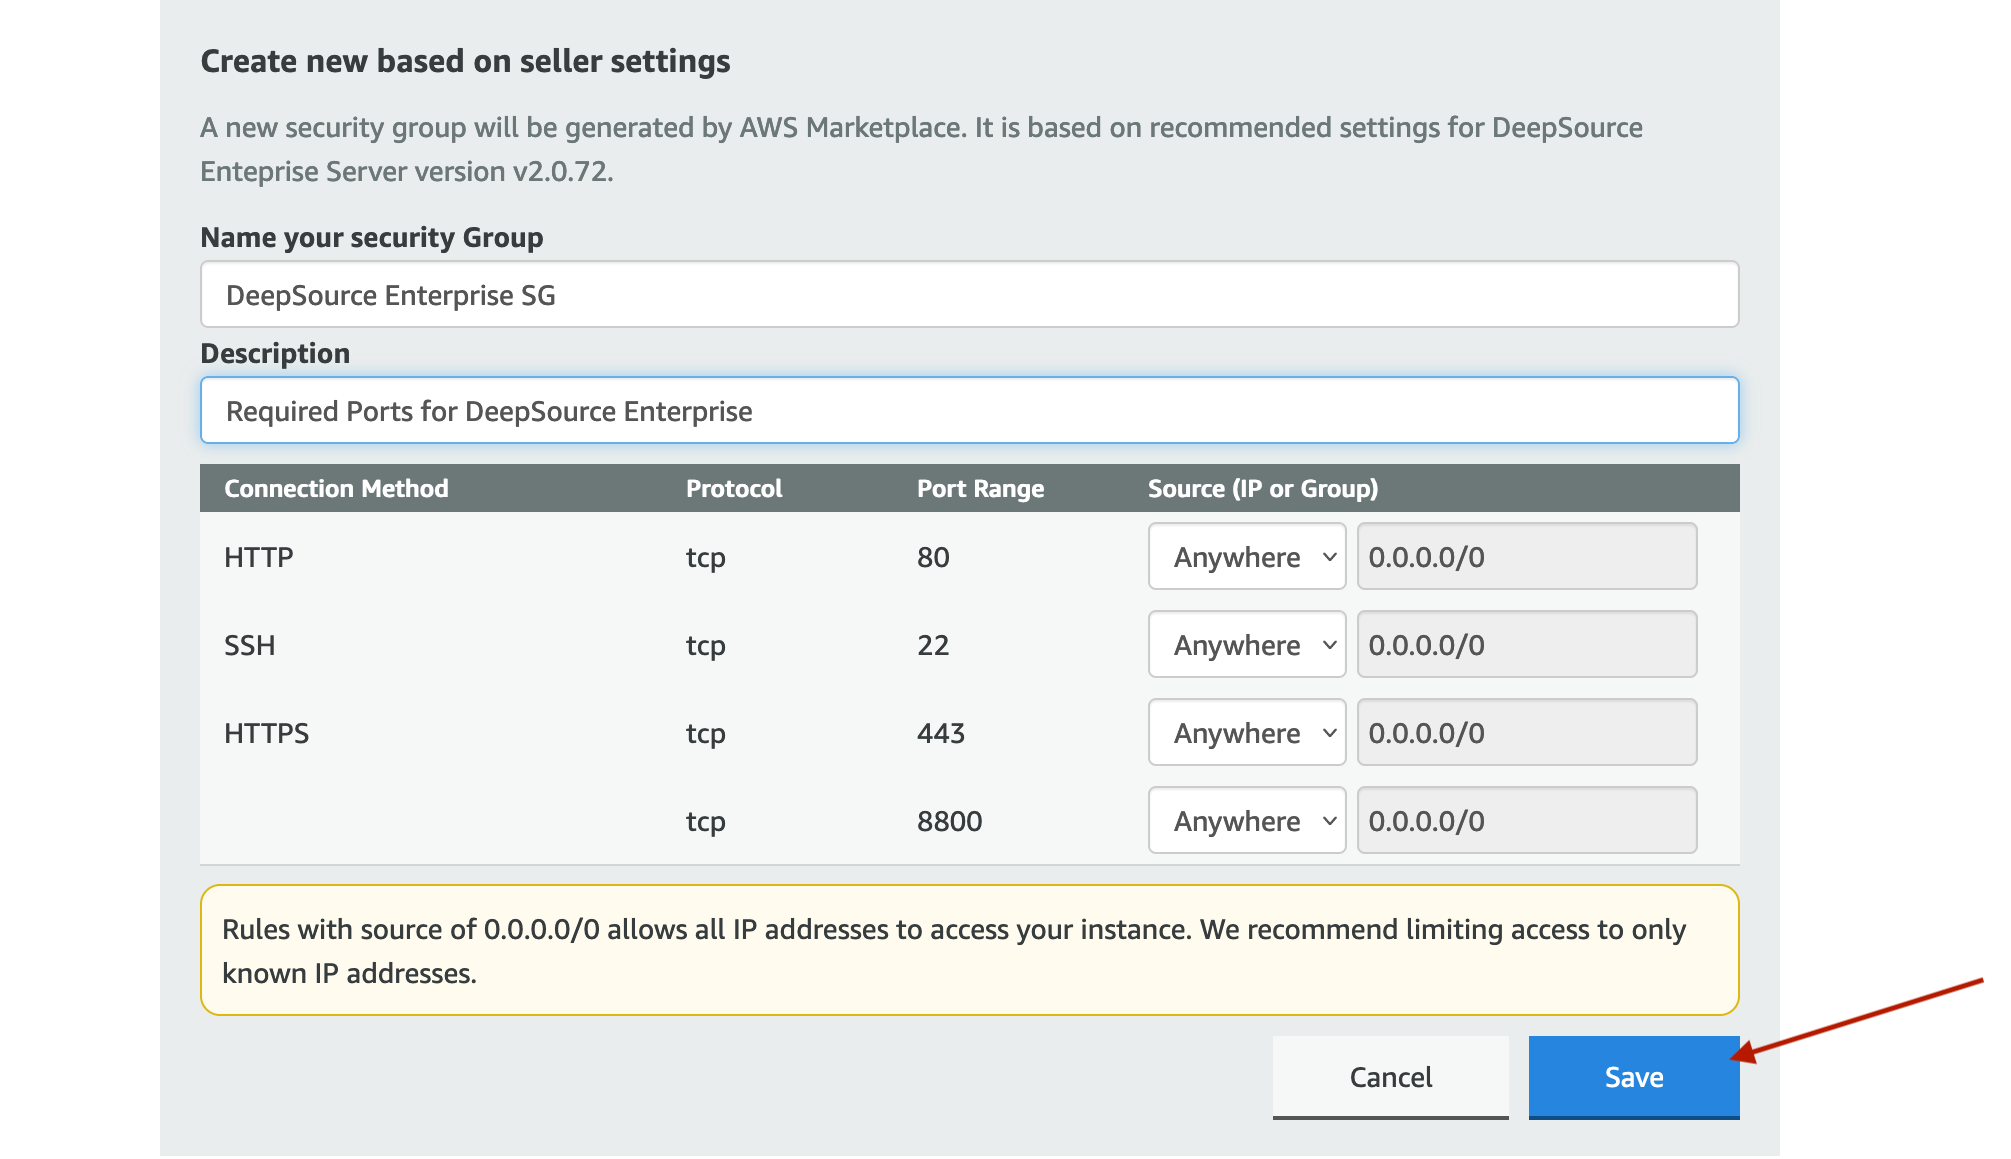 The security group created by default is permissive by design for easy installation. If you are using a VPN or other internal networks, please don't hesitate to make the necessary changes. Do note that the instance should be reachable from your Version Control System. This security group is specific to a single-node setup. If you are using this AMI for multi-node setup, edit the security group by adding the ports listed in Installation: Prerequisites.
 -
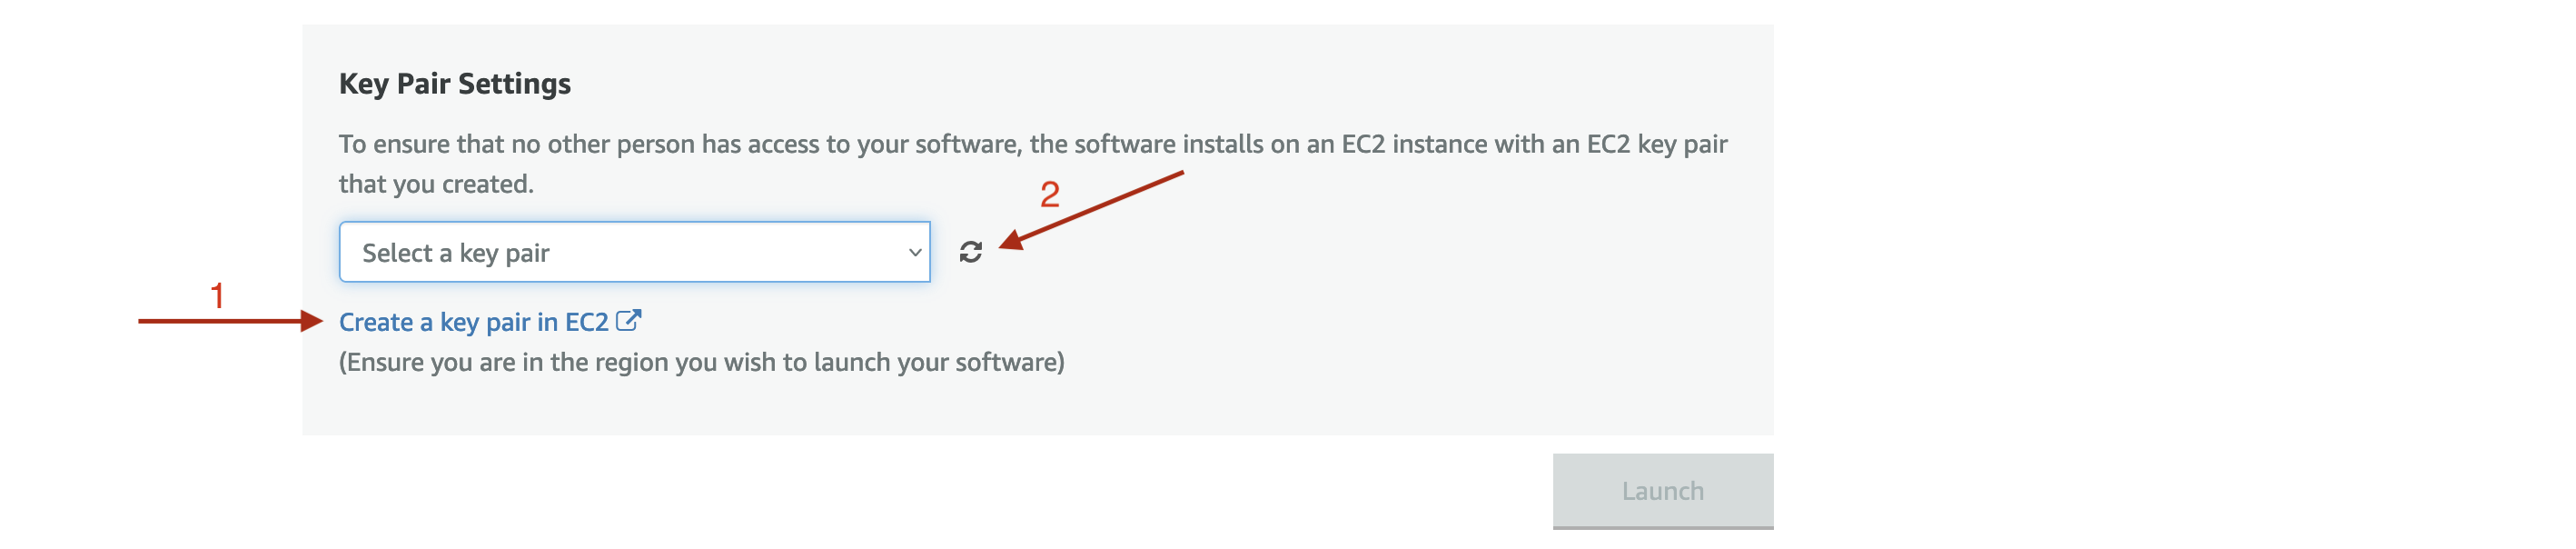
Select or create a key pair for accessing the DeepSource Enterprise Instance using SSH.
-
Select Launch and continue.

-
The following infobox should appear, click on EC2 Console and the EC2 instance page should open in new tab.

-
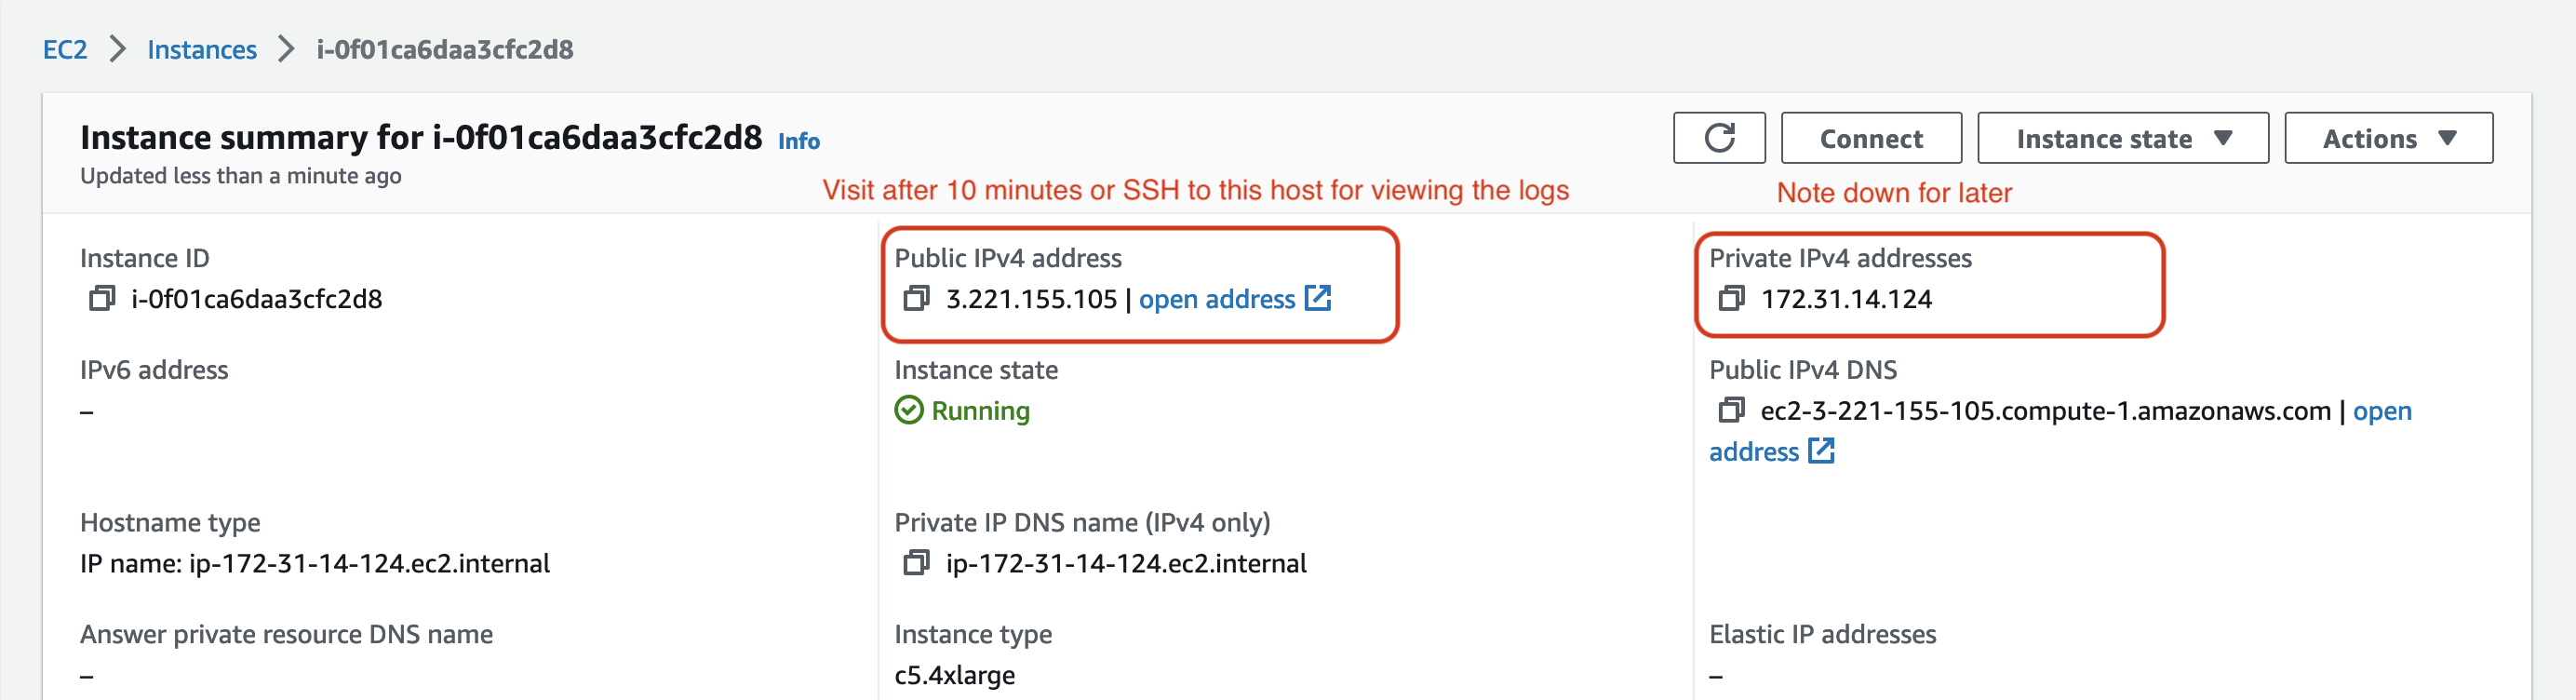
Select the DeepSource Enterprise instance created and copy the Public IPv4 Address.
-
Wait ~10 minutes for the instance to come up and then visit admin console on Public IPv4 Address with port 8800 and Click Continue to Setup.
If you want to checkout the live installation logs, you can SSH into the ec2 instance using the command
ssh -i <private_key_path> ec2-user@<instance_public_ip>. Run the commandsudo tail -f /var/log/cloud-init-output.logafter SSHing for viewing the logs in realtime.Do note that the permissions for private key from the key pair should be
400. -
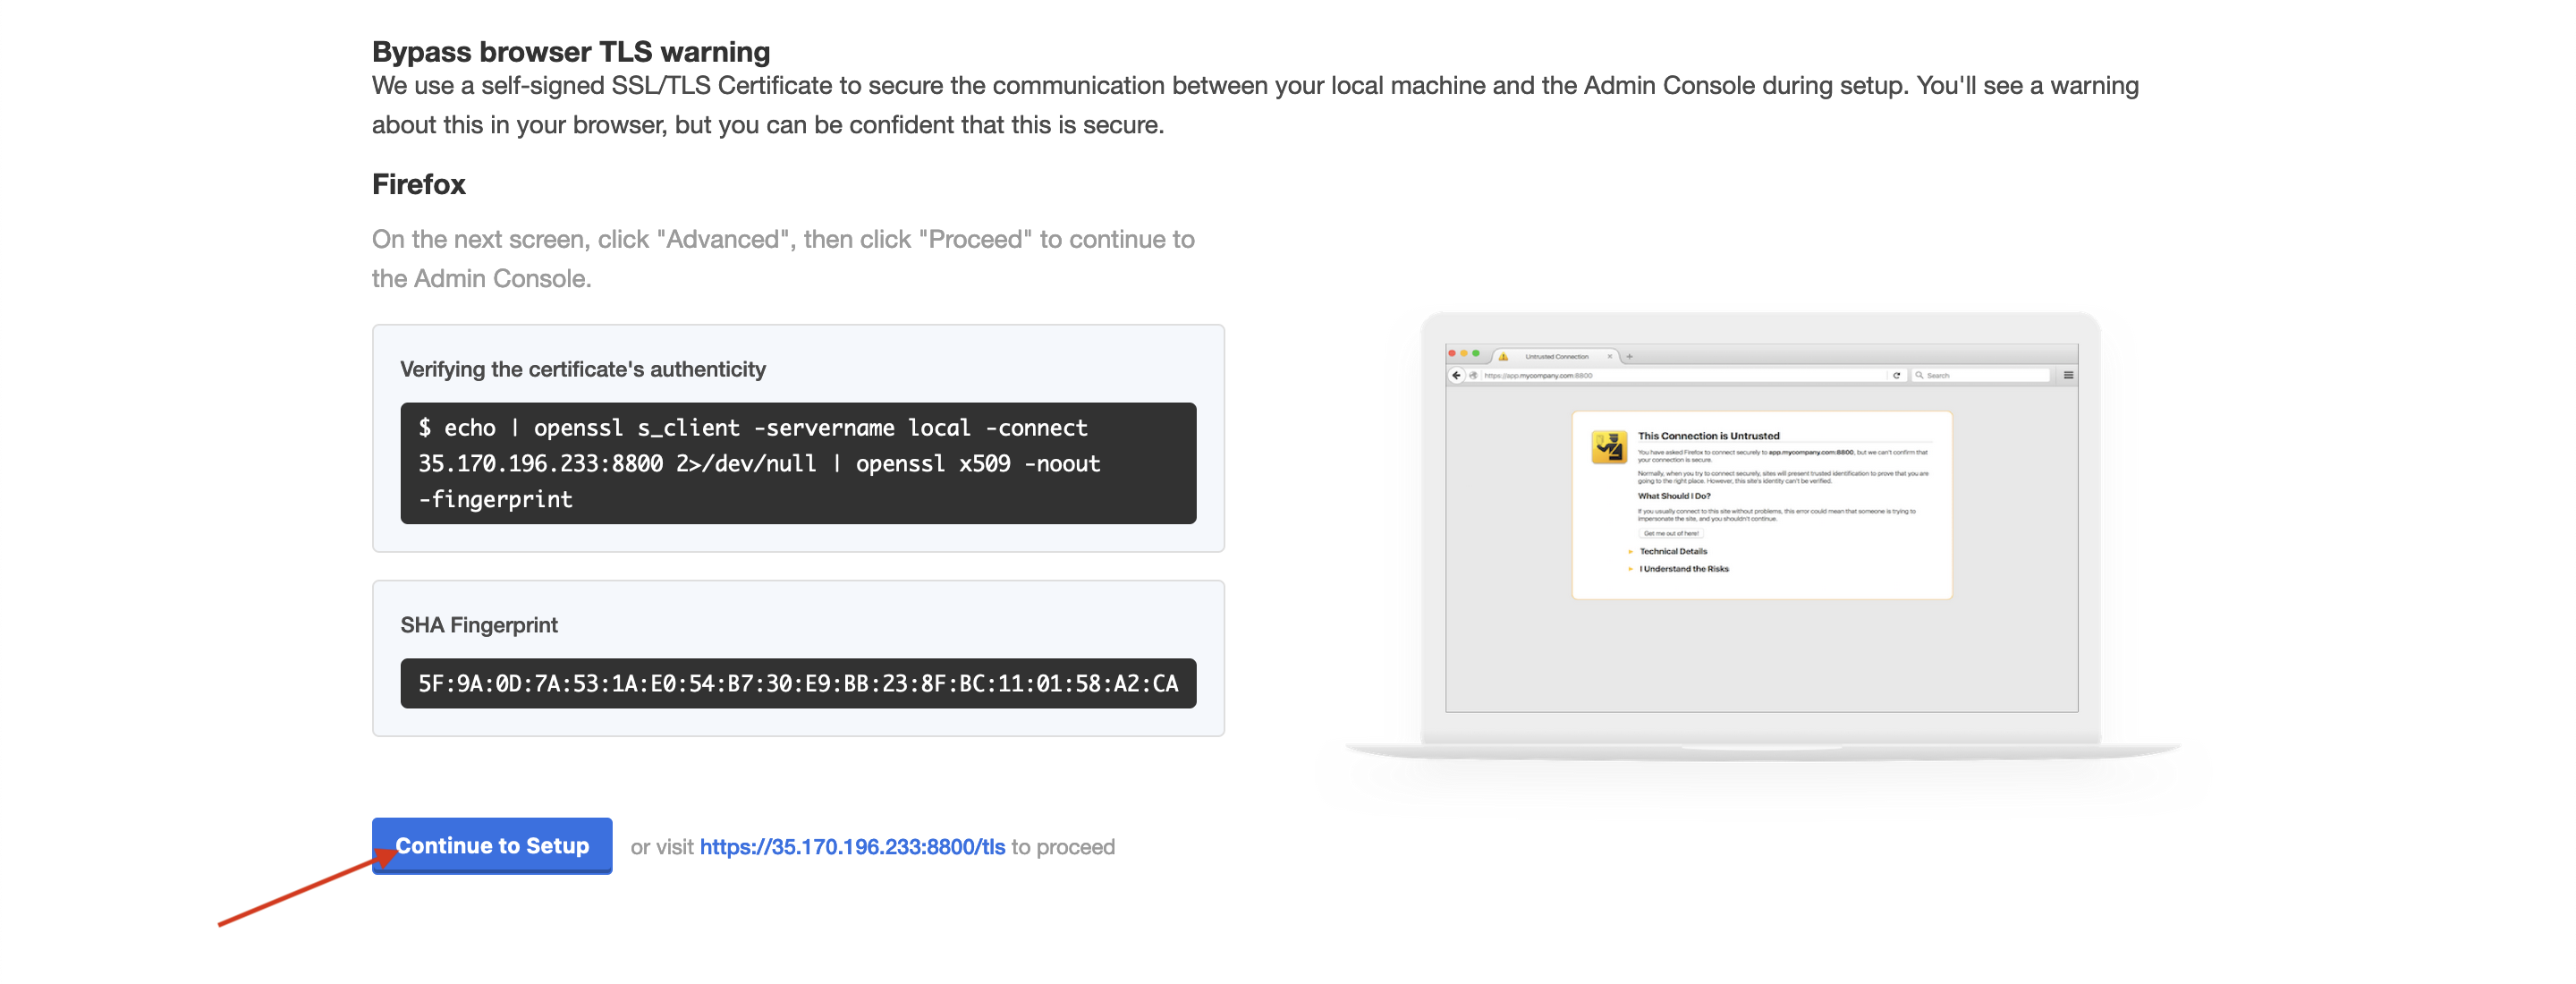
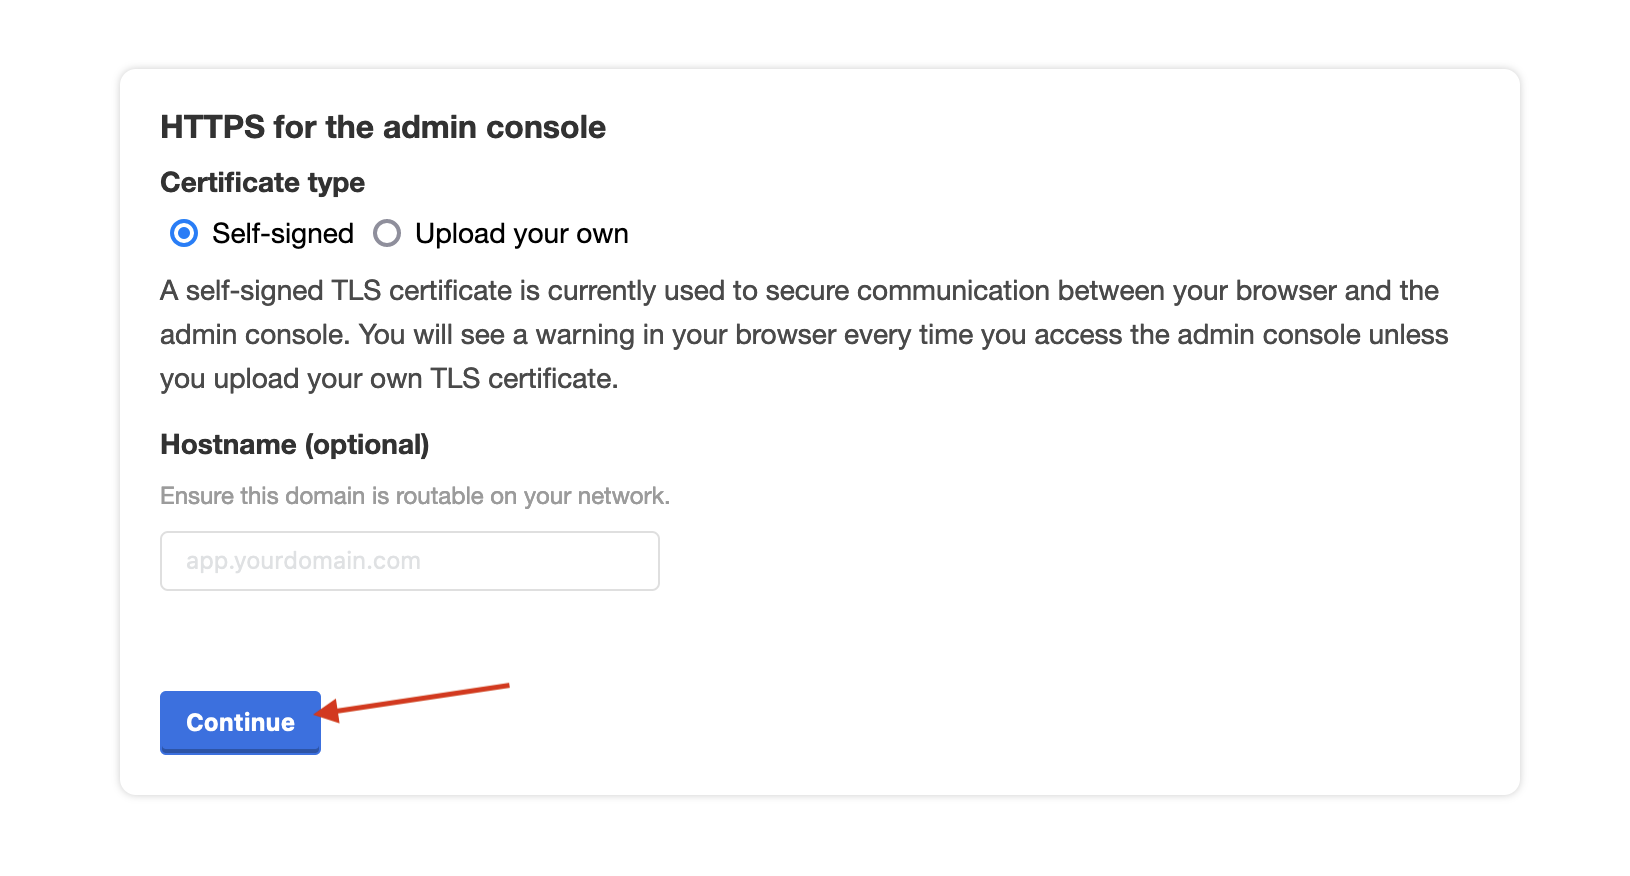
Add your hostname that points to the Public IPv4 Address and optionally upload your own SSL certificate if required but self-signed will work without any issues and proceed further to admin console login.
-
The console password is in the form
kotsadm-<Instance Private IP>, login and upload the license file on the following page and continue.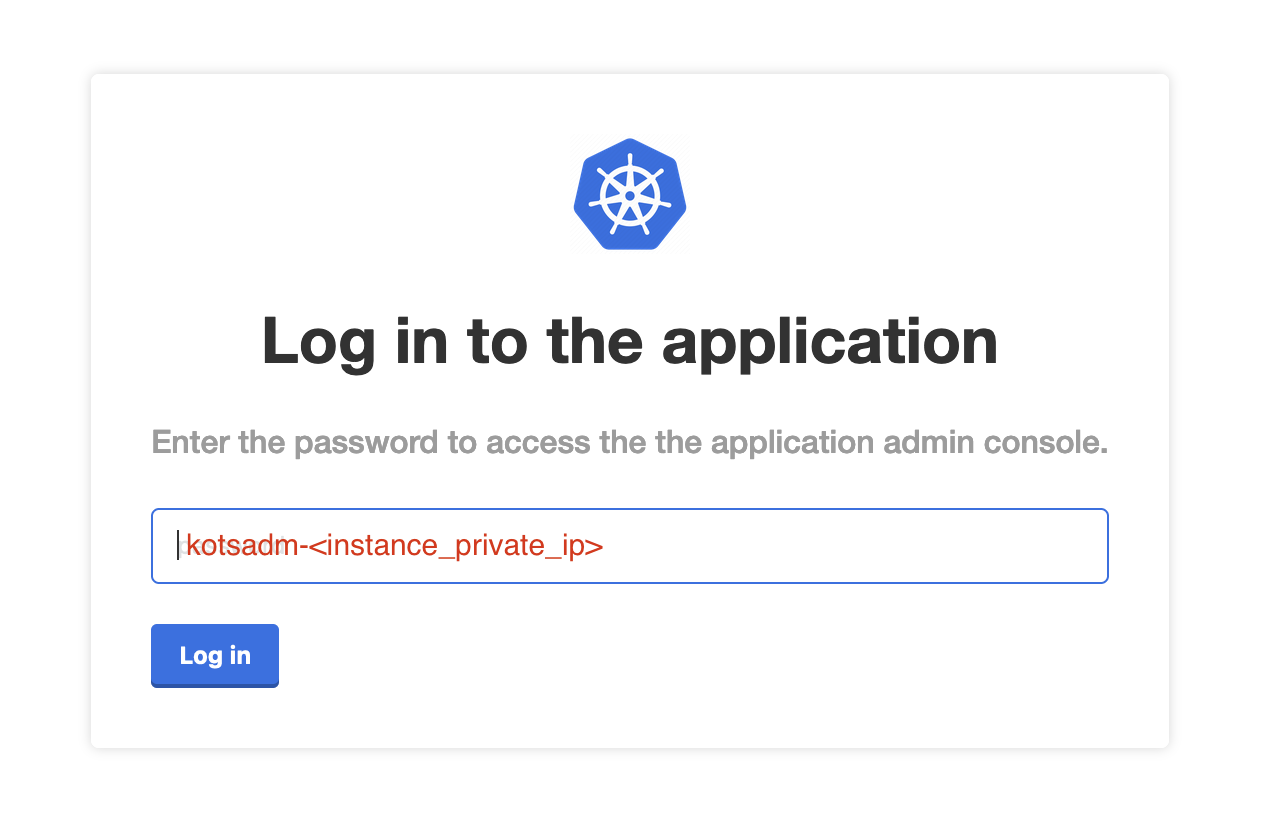
For more info on configuring and navigating Admin Console, visit Admin Console docs.